A wargaming, modeling, and miniature painting blog. These days focusing primarily on projects set in the Warhammer 40,000 universe, but not necessarily using those rules. Also the home of the Betrayal at Badab project, a rules mod for Horus Heresy: Betrayal at Calth
Friday, June 24, 2011
U.S. Vehicles.
Some U.S. tanks and vehicles to round out the Allies. These are all late war and are made by either Army Group North or Warlord Games (ex-Bolt Action Miniatures) 1/56th scale kits.
This unit of Shermans hails from the Five Boroughs of New York. The tanks are from Company B, and all of the tank names reflect this. They are: Bronx Bomber, Boilermaker, Babydoll, Berlin Bound, and Brooklyn.
A platoon of M3 halftracks for my Armored Infantry.
M8 Greyhound Armored Car and some Jeeps of the Recon platoon.
German Vehicles.
No collection is complete without some Germans to fight against. These are mostly Army Group North and JTFM 1/56th scale kits.
From the Blitzkreig collection.
Panzer I.
Panzer 38t.
Panzer III C.
Panzer IV D.
Sdkfz 251 C halftrack Platoon.
Sdkfz 11.
Stug III D.
From the Mid to Late War collection.
Panzer IV Js minus the armored skirts.
Sdkfz 234 Pumas and 2cm cannon makes nice little recon unit. The Puma is one of my favorite WWII vehicles. I don't care if they only made 101 of them, they make it into my games (and they did see a lot of action-most of them were destroyed in France).
Sdkfz 251 D halftrack platoon.
Don't forget some big cats. Panther Gs.
French Vehicles.
I decided to start cataloging my 1/56th scale vehicle collection. Some of my favorite pieces from that collection are French tanks and vehicles. Below are some shots of them. Hope you enjoy! All of these kits are from Army Group North's range of 1/56th scale kits.
Char B1.
Somua S-35.
Renault R-35s.
Panhard Armored Car.
Char B1.
Somua S-35.
Renault R-35s.
Panhard Armored Car.
Sunday, June 12, 2011
Modular Game Table System Tutorial.
Hello folks,
This weekend I had some time to take some pictures of my terrain collection and post a basic tutorial for a simple, extremely modular and adaptable, fast, and (I think) good looking table layout. Besides being relatively cheap it also features trees that can be placed anywhere and without bases. This tutorial is an expansion of my earlier Modular Forests tutorial and can be used in conjunction with the Hedgerow tutorial as well. If you are feeling particularly adventurous and want to build your own 28mm houses, can also give this Normandy Farm project a try.
Things you will need:
Interlocking foam tiles. You will need as many of these as necessary to lay out your whole table. Most of these are sold in packs of four 2'x2' squares. The color does not matter (mine are gray).
A game mat. Almost any kind will do. I have both a GW static grass mat as well as several yellowish/brown plush felt mats oversprayed with green floral spray. Almost any kind will work though.
Trees. For this you will need trees without bases, but with a hole drilled in the bottom and a pin inserted to the depth of the gray foam mats you will be using under the table. This pin technique can be used also for all kinds of things, including road signs, telephone poles, street lights etc. etc.
Foam hills (unpainted). These can be all kinds of shapes, thicknesses, and sizes. However, be warned that game mats used on top of these kinds of features do not always lay smoothly without wrinkles. Generally, the more curvy and intricate the terrain, or the higher you stack the hills underneath, the harder it is for the mat to lie smoothly. I recommend that you use pink or blue styrofoam insulation in 1" thickness with gentles slopes cut into the sides and sanded as smooth as possible to give a nice gentle slope and contour.
Terrain. Whatever else you would normally use on your game table. Walls, buildings, hedges, rocks, craters, you name it...it can be used just like you normally would on any other game table.
Limitations: There are a few considerations for this system. Things to think about before you make the plunge:
1. Trees: You will need to remove the bases from all of your trees and drill holes into the trunk and insert pins. This means you will have sharp object sticking out of whole boxes of trees. The good thing is that they store easier. The bad thing is that you can poke your fingers. I haven't hurt myself or anyone else yet... But there it is. I would suggest trying it with a few spare trees and see if you like it first before you take the plunge.
2. Rivers and major contours: Like I mentioned before, the game mats might prove difficult to lay smoothly on very intricate surfaces. If you are planning on using lots of cuts such as riverbeds, steep slopes, high hills, and anything unusually shaped or contoured, you will have problems getting the game mat to lie smoothly. In this case, you might want to consider making foam hills and covering them with the same material the mat is made out of or some other solution.
And that's about it...I can honestly say that after several months of using this system at our local game club, I have found it to be easy to store in my car, simple to set up and take down, insanely easy to adapt to all different kinds of scenarios and uses, and has the bonus if being some of the sharpest looking layouts you can get short of creating permanent scenic tiles with special terrain features. It is a great all around modular terrain system.
Now...on to the pics:
This is a simple "how to" series of pics that shows each layer of the system.
Layer 1: The interlocking gray foam tiles in a 4'x4' square.

Layer 2: Hills paced on top.
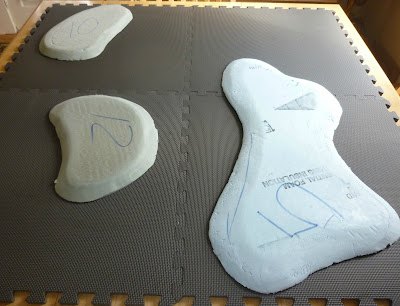
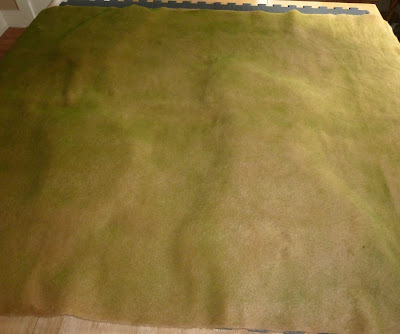
Layer 3: Game mat placed on top.
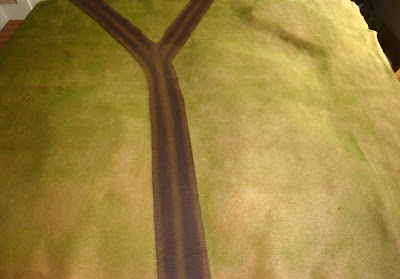
Layer 4: Roads added.
After this, add scenic items as needed. The following photos show how the same system can be changed from one type of table layout to another simply by adding elements and moving things around a little bit.
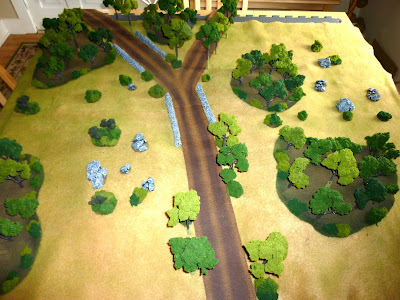
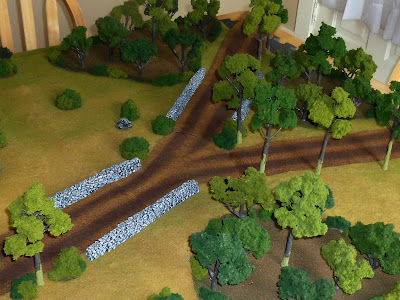
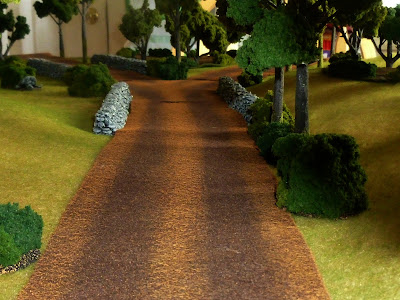
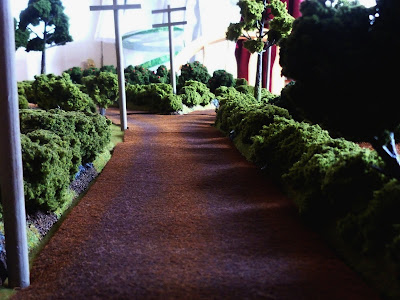
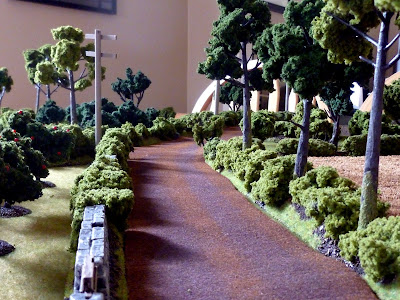
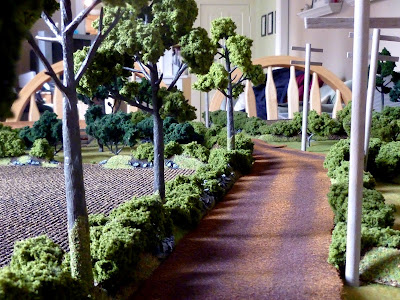
The first series of photos shows a generic wilderness type table with a road going through it. The hills are covered in trees and the open areas with rocks and bushes and other kinds of growth. The forests here are dense with trees.
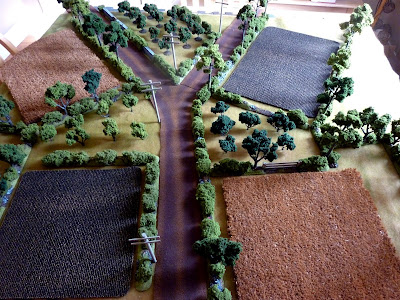
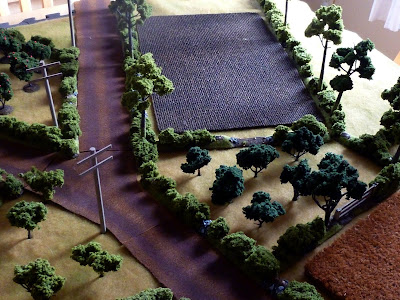
Now take the same table, remove the forests, put down some hedgerows and cultivated fields, add trees to the hedges, and you have a nice compact Normandy Bocage table.
Normandy Road Junction.
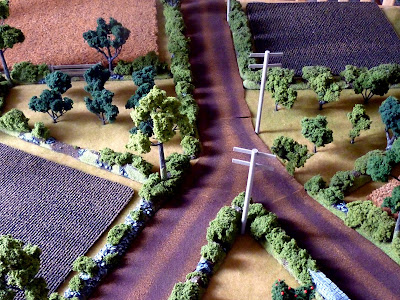
Looking from the other direction.
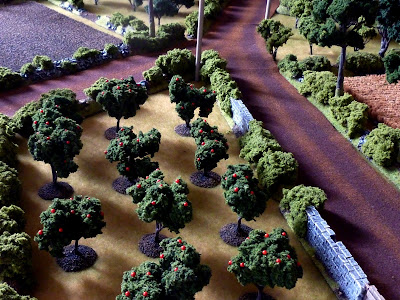
Small Normandy Apple Orchard. Probably making Calvados...
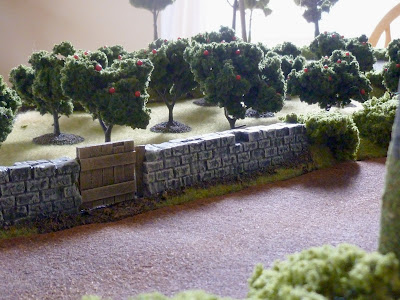
Orchard Gate.
A country lane in the Bocage.
Sleepy farm country.
Somewhere outside Caen.
Some useful tips should you decide to give this system a try:
You can do forest templates for dense forests with lots of trees and undergrowth, or you can do nice open areas of terrain with only a few sparse trees here and there and both will give a very natural look. It is also really easy to do tree lines without hedges simply by placing trees in a straight line between fields and putting a few random bushes along with them.
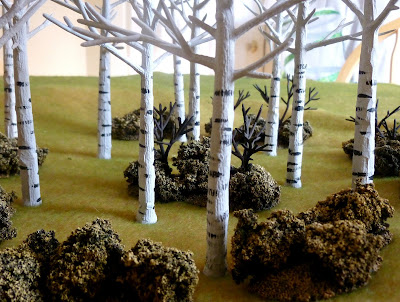
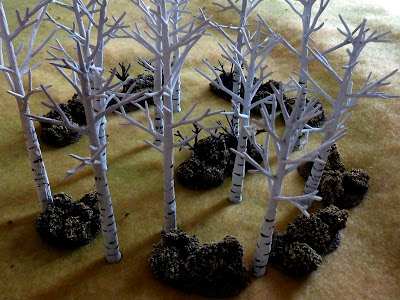
You can switch to an autumn or winter board simply by laying down a different game mat and/or using bare or evergreen trees. I am experimenting with some white birch trees to do games set on the Eastern Front in WWII or in North America during the F&I or AWI.
With this system you could potentially do sunken roads, dry riverbeds, or rivers by cutting these features into blue or pink foam or buying extra gray foam tiles and cutting them as needed. If you cut out the riverbed, lay down the game mat, and then place your river inside the sunken part it helps create the 3D effect that is so difficult to achieve on flat tables. I am just beginning to experiment with this and will post about it when I come up with something I am happy with. The tests so far have been promising.
And that's it. I hope this helped to describe the terrain system and show how easy it is.
This weekend I had some time to take some pictures of my terrain collection and post a basic tutorial for a simple, extremely modular and adaptable, fast, and (I think) good looking table layout. Besides being relatively cheap it also features trees that can be placed anywhere and without bases. This tutorial is an expansion of my earlier Modular Forests tutorial and can be used in conjunction with the Hedgerow tutorial as well. If you are feeling particularly adventurous and want to build your own 28mm houses, can also give this Normandy Farm project a try.
Things you will need:
Interlocking foam tiles. You will need as many of these as necessary to lay out your whole table. Most of these are sold in packs of four 2'x2' squares. The color does not matter (mine are gray).
A game mat. Almost any kind will do. I have both a GW static grass mat as well as several yellowish/brown plush felt mats oversprayed with green floral spray. Almost any kind will work though.
Trees. For this you will need trees without bases, but with a hole drilled in the bottom and a pin inserted to the depth of the gray foam mats you will be using under the table. This pin technique can be used also for all kinds of things, including road signs, telephone poles, street lights etc. etc.
Foam hills (unpainted). These can be all kinds of shapes, thicknesses, and sizes. However, be warned that game mats used on top of these kinds of features do not always lay smoothly without wrinkles. Generally, the more curvy and intricate the terrain, or the higher you stack the hills underneath, the harder it is for the mat to lie smoothly. I recommend that you use pink or blue styrofoam insulation in 1" thickness with gentles slopes cut into the sides and sanded as smooth as possible to give a nice gentle slope and contour.
Terrain. Whatever else you would normally use on your game table. Walls, buildings, hedges, rocks, craters, you name it...it can be used just like you normally would on any other game table.
Limitations: There are a few considerations for this system. Things to think about before you make the plunge:
1. Trees: You will need to remove the bases from all of your trees and drill holes into the trunk and insert pins. This means you will have sharp object sticking out of whole boxes of trees. The good thing is that they store easier. The bad thing is that you can poke your fingers. I haven't hurt myself or anyone else yet... But there it is. I would suggest trying it with a few spare trees and see if you like it first before you take the plunge.
2. Rivers and major contours: Like I mentioned before, the game mats might prove difficult to lay smoothly on very intricate surfaces. If you are planning on using lots of cuts such as riverbeds, steep slopes, high hills, and anything unusually shaped or contoured, you will have problems getting the game mat to lie smoothly. In this case, you might want to consider making foam hills and covering them with the same material the mat is made out of or some other solution.
And that's about it...I can honestly say that after several months of using this system at our local game club, I have found it to be easy to store in my car, simple to set up and take down, insanely easy to adapt to all different kinds of scenarios and uses, and has the bonus if being some of the sharpest looking layouts you can get short of creating permanent scenic tiles with special terrain features. It is a great all around modular terrain system.
Now...on to the pics:
This is a simple "how to" series of pics that shows each layer of the system.
Layer 1: The interlocking gray foam tiles in a 4'x4' square.

Layer 2: Hills paced on top.

Layer 3: Game mat placed on top.

Layer 4: Roads added.

After this, add scenic items as needed. The following photos show how the same system can be changed from one type of table layout to another simply by adding elements and moving things around a little bit.
The first series of photos shows a generic wilderness type table with a road going through it. The hills are covered in trees and the open areas with rocks and bushes and other kinds of growth. The forests here are dense with trees.


Now take the same table, remove the forests, put down some hedgerows and cultivated fields, add trees to the hedges, and you have a nice compact Normandy Bocage table.

Normandy Road Junction.

Looking from the other direction.

Small Normandy Apple Orchard. Probably making Calvados...

Orchard Gate.

A country lane in the Bocage.

Sleepy farm country.

Somewhere outside Caen.

Some useful tips should you decide to give this system a try:
You can do forest templates for dense forests with lots of trees and undergrowth, or you can do nice open areas of terrain with only a few sparse trees here and there and both will give a very natural look. It is also really easy to do tree lines without hedges simply by placing trees in a straight line between fields and putting a few random bushes along with them.
You can switch to an autumn or winter board simply by laying down a different game mat and/or using bare or evergreen trees. I am experimenting with some white birch trees to do games set on the Eastern Front in WWII or in North America during the F&I or AWI.


With this system you could potentially do sunken roads, dry riverbeds, or rivers by cutting these features into blue or pink foam or buying extra gray foam tiles and cutting them as needed. If you cut out the riverbed, lay down the game mat, and then place your river inside the sunken part it helps create the 3D effect that is so difficult to achieve on flat tables. I am just beginning to experiment with this and will post about it when I come up with something I am happy with. The tests so far have been promising.
And that's it. I hope this helped to describe the terrain system and show how easy it is.
Subscribe to:
Comments (Atom)


