Showing posts with label German. Show all posts

Tuesday, September 17, 2013

Massacre Outside Dubno

During Operation Barbarossa one of the largest tank engagements of the war took place during the Battle of Brody. It was a massive counterattack by the Red Army with an armored force of as many as 1,000 tanks. The Germans were taken by surprise and caught on the wrong foot while on the move. The Soviet 8th Mechanized Corps had initial success taking the town of Dubno (West of Brody), but by June 26th, the Germans had regrouped and pushed back. 16th Panzer Division first encircled, then routed Soviet tank units of Popel's Group forcing the Soviets to withdraw by July 1st.

I decided to fight a small tank skirmish from this battle using my 6mm Panzer IIIs and Soviet T-26s. I wanted to pick a battle that had the Soviets on the offensive and the Germans slightly off balance. Reading through some of the opening battles of the Barbarossa Campaign, I came across reference to the Battle of Brody and decided it would be perfect.

The game turned out to be a massacre for the Soviets.

I used Disposable Heroes: Point Blank to fight this all tank micro armor game. Point Blank is great for those detailed tank engagements where each player controls a platoon of tanks. It allows for keeping track of ammunition, damage, crew losses, and other details.

The tanks are all 6mm (1/285th scale) from GHQ. I used a ground scale of 3"=25 yards.

Special Rules for Point Blank Tank Battles:

Tank Formations: Tanks can operate in formations, with a set range of distances between each tank. This distance is listed below and no tank can be further than the formation distance from another tank it the unit. Also, the tank formations start the game in either column, wedge, V, or Flank (left/right). Once the battle began, the platoons could move as necessary outside this initial formation shape as long as they maintained the proper formation distance during the rest of the game. The roll for initiative at the beginning of the game also determined which formation a platoon would start the game.

German tank formations (Command Distance) could be anywhere from 3" out to 15" (25-125 yards). The German tanks had radios, could use more open formations, and did not have to be within LOS to act as long as they were within Command Distance.

Soviet tank formations (Command Distance) could be anywhere from 3" out to 9" (25-75 yards). Soviet tanks did not have radios at the platoon level, so they used flag signals. They could also not operate out of LOS of their platoon leader. Any Soviet tank that found itself out of LOS of its platoon leader had to take a Skill Check (Difficult -4) to use Action Points.

I allowed all tanks to share Action Points during an Activation as long as they were within formation. Also, if a unit was moving in column, as long as no tank in the platoon attempted to acquire a target, did not fire, reload, or take any other action, the whole platoon could move up to the column leader's fast speed with the lead tank moving no further than the fast speed and the rest of the tanks in the platoon in a line behind. This allowed for a reserve move (especially down roads), but could pose a danger if the enemy was nearby to exploit the bunching rules in Point Blank.

Lastly, I used the Ammunition Ready Rack rules and gave each tank a select number of rounds in their ready racks ready to go. Any tank that ran out would have to reload their ready racks before being able to fire again.

The forces involved were as follows:

Germans:
Platoon of Panzer III F/G with 5cm gun. Ready Rack: 8 rounds.

Tank 111* (Platoon Leader)
Tank 112
Tank 113
Tank 114
Tank 115
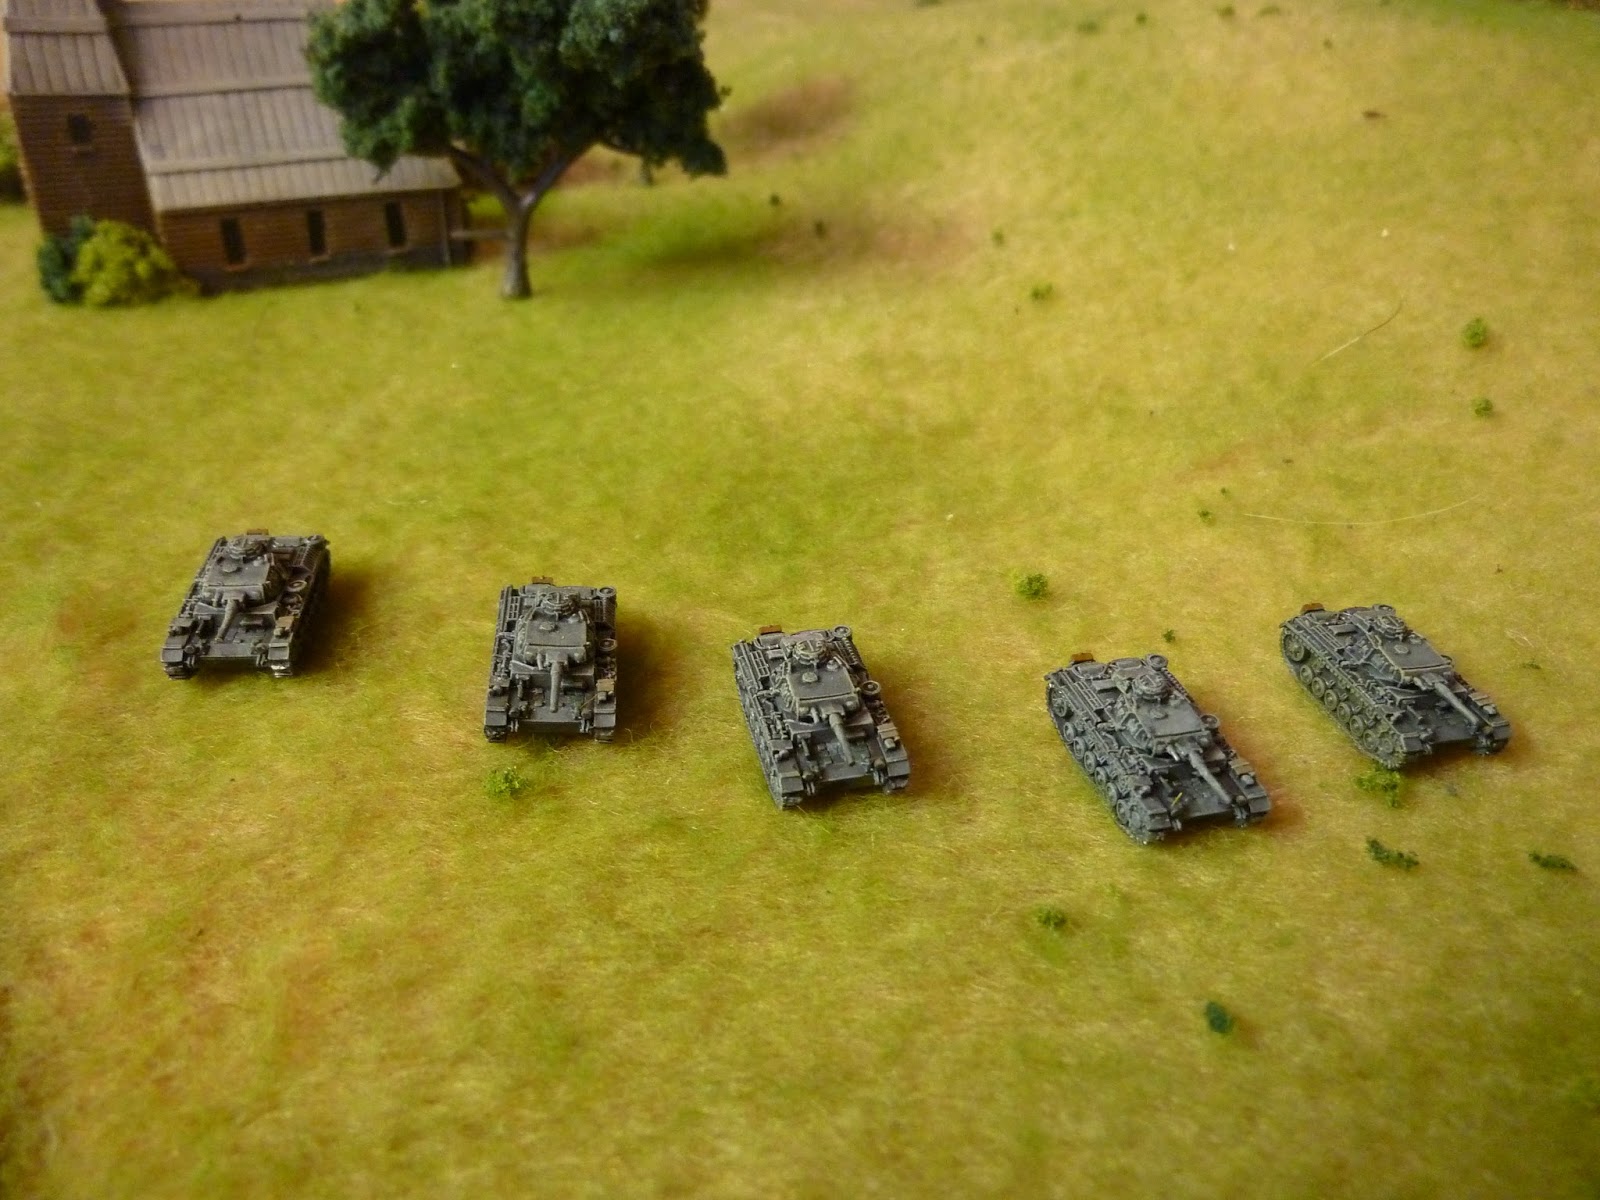
Platoon of Panzer III F/Gs with 5cm gun

The German crews had the following stats:

Accuracy: 5
Guts: 10 (Lt.), 9 (Sgt.), 8 (Crew)
T&E: +2 (Elite)
Activation Pool: 12

The Platoon Leader tank was commanded by the Lt., while the rest of the tanks were commanded by Sgt.s.

Soviets:
2 Platoons of Soviet T-26 1939. Ready Rack: 5 rounds.

Tank 1* (Platoon Leader)
Tank 2
Tank 3
Tank 4

Tank 5* (Platoon Leader)
Tank 6
Tank 7
Tank 8

Platoon of T-26 1939

The Soviet crews had the following stats:

Accuracy: 5
Guts: 8 (Lt.), 7 (Sgt.), 6 (Crew)
T&E: 0 (Trained)
Activation Pool: 8

The Platoon Leader tank was commanded by the Lt., while the rest of the tanks were commanded by Sgt.s.

The table. A farm outside the town of Dubno. Top is West

The game began with a roll for Initiative. The winner of Initiative would be allowed to choose to go first or second, and would be allowed to set up anywhere on his side of the table within 10" and in any formation. The loser would be forced to deploy first and in column on a road on his side of the table within 10".


The Germans won the roll for Initiative. The Soviets deployed first, and the Germans decided to take the first Activation.

Soviet tank platoon in column.

2nd Soviet Platoon in column heading East from Dubno.


Activation 1: Germans.

Tank 111 moves slow speed down the road to find the Soviet column in his view. The platoon leader tank Acquires the lead tank in the Soviet column, fires, and misses! The crew then reloads.

Activation 1: Soviets.

Tank 1 and 2 move forward at slow speed. Tank 1 Acquires German tank 111, fires, and hits the tank in the track. The round penetrates and damages the track, reducing the vehicle to slow speed for the rest of the game.

Activation 2: Germans.

Tank 111 moves slow speed right, fires at the same Soviet tank 1, and once again misses!

Activation 2: Soviets.

Tank 2 moves slow speed left next to the farmhouse. Tank 3 moves slow speed forward on the road.

Activation 3: Germans.

Tank 111 fires again at Soviet tank 1 and misses for a third time. Tank 114 moves up onto the nearby hill on the left and Acquires Soviet tank 3.

Activation 3: Soviets.

Tanks 5, 6, 7, and 8 all move fast speed in a column, going off road and swinging to the right and towards the hill.

Soviet column moves towards right hill.

Activation 4: Germans.

Tank 111 reloads, fires again, and finally hits Soviet tank 1. The round penetrates and the tank is brewed up. Some of the crew survive, but they flee to the rear.


Tank 114 fires and hits Soviet tank 3. The round penetrates with a catastrophic result! The vehicle is destroyed and the entire crew is killed. Two tanks in one Activation!


The massacre has begun...

Activation 4: Soviets.

With their platoon leader dead, the rest of the Soviet platoon take a Guts check. Surprisingly, the platoon passes the Guts check and continue the fight!

Activation 5: Germans.

Tank 115 and 112 move fast speed onto the hill on the left flank.


Activation 5: Soviets.

Tank 5 and 6 move up slow and medium speed towards the hill on the right.


Activation 6: Germans.

Tank 115 moves up slow speed to the edge of the woods on top of the hill on the left. The crew Acquire Soviet tank 5. They fire and hit! The round penetrates the hull and the resulting explosion sends another fire plume towards the sky.

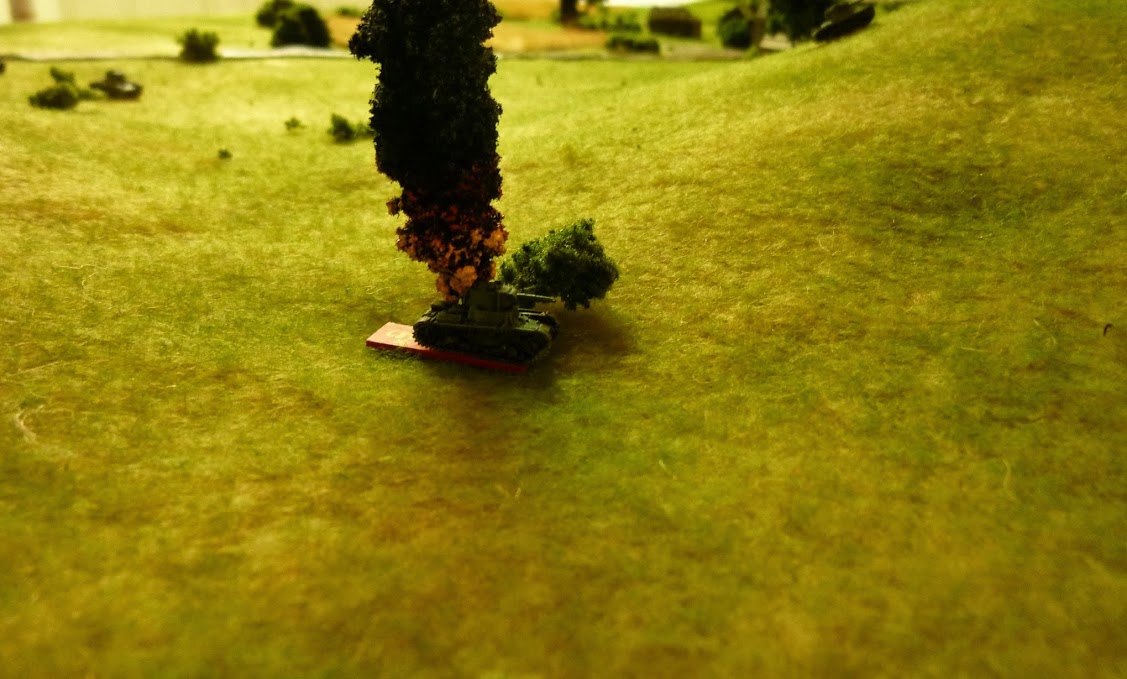

Activation 6: Soviets.

The loss of another platoon leader sends the second Soviet platoon into a panic. The platoon fails their Guts check and tank 6, 7, and 8 full reverse towards their table edge. On the other Soviet flank, tank 2 passes a Skill Check to Activate after the loss of his platoon leader and succeeds. Tank 2 then moves slow speed into a position to spot the enemy, but fails to Acquire German tank 114.

Activation 7: Germans.

Tank 114 Acquires Soviet tank 2, fires and misses. The crew reloads, fires again, and hits. This time, the round penetrates and another Soviet tank is brewed up!


Activation 7: Soviets.

After also passing a Skill check to Activate, tank 4 moves onto the hill on the right, taking up a position on the flank of German tank 112. The crew fails to Acquire their target.


Activation 8: Germans.

Tank 112 fails it's Acquisition roll to spot the flanking maneuver of Soviet tank 4, so the crew cannot react to this new threat. However, tank 115 moves medium speed across the low depression between the hills on the right and takes up a position on the hilltop within view of the Soviet platoon that was withdrawing from the battle. The crew Acquires Soviet tank 7. They fire, hit, and using their elite crew skill, move their hit result from a track hit to a hull hit. The round penetrates and once more, a Soviet tank bursts into flames!


Activation 8: Soviets.

Tank 4 now Acquires German tank 112. The crew fires, hits, and penetrates with a major damage result to the track. The Soviet crew decides to reload and fire again to make sure their target is destroyed. This time, the round hits, penetrates, and causes a catastrophic internal explosion! The Soviets have gotten their first, and only kill of the battle. This is also the last Activation from their Activation Pool for the Soviets this turn. From here on out, the Germans can Activate the rest of the Activations from their pool.


German Activation 9-12:

 It's pretty much over for the Soviets. The Germans maneuver a few more of the tanks in their platoon into firing positions or towards the objective. Tank 115 moves into a position to Acquire, fire at, and knock out Soviet tank 8. At the end of the German Activations, the game is called.

The Germans advance on Dubno farm.

German positions at game end.

Results:

What a massacre!

 Soviet Losses:

Tank 1* Platoon Leader
Tank 2
Tank 3
Tank 5* Platoon Leader
Tank 7
Tank 8

Massive losses, and all but one tank was a catastrophic explosion of the vehicle and the death of the crew.

German Losses:

Tank 112
Tank 111 damaged

The Germans clearly won a major victory here. The Soviets not only lost the Initiative to start the game, but the German gunnery was excellent. Other than the German platoon leaders first few shots, the Germans hit and penetrated everything they shot at. Their 5cm guns sliced through the T-26 likes a hot knife through butter. The only bright spot for the Soviets was the T-26 that was able to sneak onto the flank of 112 and get two nice solid flank shots. The Germans were surprised by the move, but they were otherwise in too powerful a position by the end of the turn for it to make a difference.

There you have it! A single turn of Disposable Heroes: Point Blank as an all tank skirmish using micro armor. Games of Point Blank move fast and the action is furious. This battle ended up pretty one sided. The Soviets just couldn't seem to stand up against that expert German gunnery in this game. Still, they were not completely incompetent. Despite the loss of their platoon leaders, at least a few of their tanks attempted to maneuver and engage. Sometimes, that's just the way combat goes.

I love the early war period, where even a 5cm gun can dominate the battlefield. If only the Soviets had brought along a few of their T-34s. Maybe next time they will when the Germans try to push on past Brody...

For now, the 16th Panzer Division rides forward in victory.

Saturday, December 1, 2012

10th Motorized Cavalry Brigade.

I'm on a roll this week...

One of my favorite units from WWII is the Polish 10th Motorized Cavalry Brigade.

I have been excited about this project ever since I learned that Blitzkrieg Laboratories and Gorgon Studios were going to release the miniatures for this famous unit. These tough bastards fought the Germans in Poland in 1939. They fought vicious delaying and harassing actions against the 4th Light Division and Gebirgsjagers along the southern Polish border and then in defense of Krakow before escaping into Hungary. They were rebuilt in 1940 in France as the 10th Armord Cavalry Brigade and once again faced the Germans. This time, they fought a tough campaign, fighting almost alone against several German divisions. They somehow managed to escape to Britain where they were rebuilt as the 1st Polish Armoured Division. In 1944 they would find themselves in France for the final drive to Germany and the end of the war. They are a rare unit to have fought the Germans on two fronts and in three campaigns as part of three different armies. The earned their nickname in Poland in 1939 as the "Black Brigade" on account of their distinct uniform of black leather trench coats and Austrian WWI stahlhelms.

These miniatures are all new models from a new company called Blitzkrieg Laboratories jointly released with Gorgon Studios. I had the fortune to be given some promotional models to run a game at the 2012 Fall In convention here in Lancaster, PA. Thanks to Aaron, I was able to deploy a platoon of these awesome models against my Crusader Miniatures early War Germans. Aaron is planning to expand the range and they have also released Gebirgsjagers for the early period of the war. Check them out!

Unfortunately, I wasn't able to take pictures of the game I ran. I forgot my camera and my phone ran out of battery power...d'oh!

Here are some pics. They came out a little dark because it was hard to get the settings right to be able to see detail and yet not have the jackets look gray and washed out.

The packs are structured in a way that makes building a platoon very easy. The Anti Tank gun crew are a mortar crew filling in on the job until they release more minis for other support weapons.

The building in the background is from Old Glory. The Bofors ATG an the TKS Tankettes are from Warlord Games.

I plan to do a full, and proper battle report with these guys pretty soon.

Enjoy!

Lieutenant and Driver

Sergeant

Platoon Sergeant and Runner


Second Section

Wz 36 Bofors ATG

Wz 35 Anti Tank Rifle

Wz 36 Granatnik

TKS Tankettes

Monday, March 12, 2012

2012 Spring/Summer Projects Preview.

Now that Cold Wars is over and I picked up some new lead to add to the pile, I thought about the projects I want to do for the coming Spring and Summer.

I have been painting a few individual figures here and there as test models for brand new projects. They are a motley assortment of WWII, Sci-Fi, Old West, Weird War II, and Moderns. Here are a few pics to preview what I will be up to as the weather gets warmer.


Early War SS.

Buffalo Soldiers. (cue Bob Marley).

Kolony Militia Test Paint.


Goumier.


The Sarissa Precision Charcuterie (butcher's shop).

AT-43 Red Blok Kolossus converted and turned into Weird WWII "Iron Ivans".

Iron Ivan tank hunter team.

The barrel on the grenade launcher has been replaced with a turned tapered plastic barrel to make it into a 37mm ATG.

Dust Tactics "Luther"

Dual Pak 43 ATGs. Is that overkill maybe?


Oh good, this one only has one Pak 43...

The Project List for Spring Summer (in order of what I want to finish first):

Mordheim Kislevite Warband (using Old Glory Cossacks-the old OOP GW models are WAY too expensive). 15 models.

28mm Buffalo Soldiers group for our club Old West project (Artizan Designs Miniatures). 10 models.

28mm Early War SS (Warlord Miniatures). 30+ models.

28mm Early War Brits (Warlord Miniatures). 30+ models.

28mm Kolony Militia and Rebels (to help Chalfant playtest the forthcoming sci-fi system from Iron Ivan Games-tentatively titled "Zero Sum Oblivion"). I also picked up some vehicles to go with them (Old Crow Models). 50+ models.

28mm Modern USMC in current day operations gear (Eureka Miniatures). 14 models.

28mm Moroccan Goumiers (Artizan Designs Miniatures). I want to do some conversions for these to add heavy weapons that aren't currently available and to add some variety so they are usable from Italy all the way through the Vosges Mountains campaign and into Germany 1945). I really look forward to this one. Painting the traditional striped hooded pullovers they wear is really fun. 30+ models.

 28mm Belgian Chasseurs Ardennais (Warlord Miniatures). 10 models.

More Dust Tactics and AT-43 stuff as it becomes available and I can find it.

Ongoing: Finish the rest of the Sarissa Precision French Village I started...

Thursday, January 19, 2012

Battle of the Bulge Club Game.

Our game club, Army Group York (York Pennsylvania) played the following scenario on January 7th. The game was a platoon level game using the Disposable Heroes: Point Blank rules. Each player controlled a squad and/or platoon command and support assets. The following scenario is what was handed out to players before the game.

January 3rd, 1945, Neffe Belgium.

The great German surprise offensive has been stalled. After driving for the Meuse River and towards Antwerp, the Germans were stopped cold around the now famous town of Bastogne. Now that the "siege" has been lifted and the U.S. is back on the offensive, it falls to you to spearhead the attack or to hold onto ground already bled for. Despite running out of steam and never coming close to their objective of Antwerp, the Germans have still managed to launch a new offensive in Alsace and Lorraine (Operation Nordwind). While most of the German units in the immediate Bastogne area are short of men and supplies and are now on the defensive, they are still able to mount counterattacks and many of the units are experienced veterans. U.S. forces are tired and battered, but they are once again on the attack with clear weather and ample air support.

Historical Situation: (Meeting Engagement, U.S. slight defensive posture).

Neffe was one of the first towns the Germans captured on the way to Bastogne. American armored units from Team Cherry and some 101st Airborne engineers held out as long as possible, but eventually it was captured and they were driven back into Bastogne itself. The initial counterattacks out of Bastogne in January had been successful, but the situation was very fluid. Probes and attacks were met with counterattacks. On the way out of Bastogne, units of the 101st had captured Foy and several other towns on the northern shoulder of the city, but now it was time to start the drive East.

The Battle: 

January 3rd: U.S. forces have sent in a forward platoon into the Western portion of the village and discovered it to be empty of Germans. However, the sound of engines can be heard from the East. The Americans will have little time to dig in and for the Germans it is a race to capture any vital ground possible to delay or hold the Americans.

Historical note: This is a semi-fictional scenario but is based on a known village (Neffe), and involves actual units operating in the area. I could not find reference to a specific action taking place in the town at this exact time, but the units are correct and the town layout is based on photos and maps of the area. The setting and time frame was chosen because I liked the look of the town, and I wanted to be able to have both sides on the attack. Plus, I think the post Offensive phase of the Bulge is a neglected gaming period. Both sides were tired, stretched thin, and were required to take part in a chaotic operational situation.

The Forces:

U.S. Airborne platoon of the 101st Division, 506th PIR. No support except possible reinforcement by unknown U.S. armored units.

Germans: Elements of 26th Volksgrenadier Division Division, Grenadier-Regiment 77. Supported by tanks of the 130th Panzer Regiment of the Panzer Lehr Division.

Objectives:

Both sides must consolidate their hold on the town by driving out enemy forces and capturing and cutting off routes of approach as well as taking as many tactically valuable locations as possible.

U.S. Airborne Briefing

Lieutenant,

We are on the move. Fritz has put his head in a noose by attacking into the Ardennes Forest. Now it is up to us to hang him. Your platoon is the vanguard of our counteroffensive designed to hurl his forces back on all fronts. We have reports that a new German offensive has opened in the Alsace and Lorraine region, but it appears to be a bit of last minute desperation. Regardless, it does not change our objective here.

The Germans have left a minimal blocking force around Bastogne as they attempt to withdraw. We are pushing on Foy, Noville, and Bizory, but we must now begin to push East. Your objective is the village of Neffe. German counterattacks are possible, but we expect minimal opposition by tired and dispirited enemy troops.

There is only one main road into Neffe, and it has a view of the valley beyond, but there are several large hills facing the town the enemy could use to spot for harassing artillery. Those hills and any roads or exit points beyond the main village must be taken. Establish a platoon CP within the village as a base for further advances. There should be at least a few buildings standing that will provide some good cover and observation. Keep an eye on the stream and some of the trails leading off the main road as it might offer a covered approach to the enemy. We can expect no air cover for this push as all of our air groups are shooting down the Luftwaffe somewhere else. Artillery support is limited to your platoon 60s. Our artillery is still getting organized in Bastogne and has not been able to keep up. If confronted by a large German counterattack with armor, call for support from HQ and we will try to dispatch some tanks from the remains of Team Cherry. However, it is possible no help will be forthcoming as they will be needed everywhere at once across this sector.

Objectives (select two capture, one hold):

Capture:

Main road exit
Eastern road exit
Bridge over creek
Hill 210

Hold:

Establish Platoon CP in village and hold (Platoon HQ)
Main road and trail crossroad
Creek bridge
Southern farm

German Briefing

Herr Leutnant,

Our great offensive has been temporarily halted. While some of our units withdraw to reorganize, we have been tasked with holding the line outside Bastogne in the hopes of a future counteroffensive. The Americans have broken out of our ring of steel at Bastogne, but they are already bogging down in our stubborn defense and the poor roads. Thanks to a Luftwaffe air offensive and our offensive in Alsace and Lorraine, it has drawn off most of the prowling American air support. Time is of the essence here. We must hold long enough and as far forward enough to buy time for our forces to regroup.

The town of Neffe is our first objective. It is one of the key roads out of Bastogne heading east. If we can stall the Americans here, we can help our forces fighting north of Foy. Our grenadiers must bear the brunt of the work as the panzers withdraw. However, a company from the Panzer Lehr division has been allocated to support this sector. There are not many of them, but since American armor is not expected in the immediate area, this should not be a problem. We have reports of only a platoon of American airborne troops in the town. If we strike fast, we can catch them before they are prepared.

Neffe has only one main road into the village. However, there are three other possible entry points: a valley stream, a small trail connecting the main road, and a small road that crosses the stream and links up with the main road behind the village. Use your scouts to locate and guide your squads in. Taking the secondary road that links up behind the village would be an ideal flanking mission. The stream will be little use to vehicles, but might be a way for infantry to sneak into the village. The main road is probably the most dangerous, as it will surely be covered by fire unless you act swiftly and get into town before the Americans. The trail is probably the most limited as it is merely a covered approach alternative to the main road.

Objectives (select 3 Capture):

Capture:

Village
Bridge over creek
Secondary road exit
Main road exit
Destroy or capture American troops
Destroy any American armor

The Table: 6'x8' (Deployment zones along 8' edge)

The Forces:

U.S. Airborne
ACC: 5
CC: 6
Gut: Lt. (10), Platoon Sgt. (9), Sgt. (8), Corporal (7), Private (6)
T&E: Elite +2

1x Platoon HQ (Player 1):

1 Lt. w/ M1 Carbine
1 Platoon Sgt. w/ Thompson SMG
1 Medic
1 Radioman w/ Thompson SMG
2 Privates (Runners) w/ M1 Carbine

2x Rifle Squad (Players 2 & 3):

Rifle Team:

1 Sgt. w/ Thompson SMG
7 Privates w/ M1 Garand

LMG Team:

1 Corporal w/ M1 Garand
1 Private (LMG Gunner) w/ M1919A6 LMG
1 Private (Assistant) w/ M1 Carbine
1 Private (Assistant) w/ M1 Garand

1x 60mm Mortar Squad (Player 4):

1 Sgt. w/ M1 Carbine
1 Gunner w/ 60mm Mortar
2 Privates (Assistants) w/M1 Carbine
4 Privates (Ammo bearers) w/ M1 Garand

1x MMG Team (Player 1):

1 Sgt. w/ M1 Carbine
1 Private (Gunner) w/ M1919A4 HMG
1 Private (Assistant) w/ M1 Garand

2x Bazooka Teams (Player 1):

1 Private w/ Bazooka
1 Private w/ M1 Carbine/Thompson SMG

2x M4A3 Shermans (Player 1)

Note: The MMG, Bazooka Teams, and Shermans can be controlled by Player 1 or given to any other player in the U.S. Force.

Germans

ACC: 5
CC: 6
Gut: Lt. (9), Platoon Sgt. (8), Sgt. (7), Corporal (6), Private (5)
T&E: Veteran +1

1x Platoon HQ (Player 1):

1 Lt. w/ MP-40 SMG
1 Platoon Sgt. w/ MP-40
1 Radioman
2 Privates (Runners) w/ Kar-98k

3x Rifle Squads (Players 2, 3, & 4):

Rifle Team:

1 Sgt. w/ MP-40 SMG
6 Privates w/ Kar-98k

LMG Team:

1 Corporal w/ MP-40 SMG
1 Private (Gunner) w/ MG-42 LMG
1 Private (Assistant) w/ Kar-98k

1x Panzerschreck Team (Player 1):
1 Private w/ Panzerschreck
1 Private w/ Kar 98k

1x HMG Team (Player 1):
1 Corporal w/ MP-40 SMG
1 Private (Gunner) w/ MG-42 HMG
1 Private (Assistant) w/ Kar-98k

2x Panzer IV H (Player 1)

Note: The Panzerschreck Team, HMG, and Panzer IVs can be controlled by Player 1 or given to any other player in the German Force.

This game uses the rules system Disposable Heroes: Point Blank. In addition, we used some special rules for platoon sized games. These include rules for runners, ranging mortars and ammunition, as well as some of the special rules from Point Blank (add T&E to wound score).

The scenario also involved pre-game recon. Each platoon HQ player (Player 1) was allowed to make 3 recon attempts from a scout in each of his squads. We used the recon chart in the optional section of Disposable Heroes & Coffin for Seven Brothers (using the infantry entry). Failed recon rolls can mean the loss of the scout. Each scout may make multiple attempts to recon, but the chances of getting killed or captured go up (follow the rules for recon in DHC7B) except that instead of discovering hidden units there are different outcomes for each side:

For the U.S., recon attempts allow German units to be discovered and placed on the table before the U.S. deploys.

For the Germans, each of several locations on the German deployment side can be rolled for:

The Secondary Road
The Frozen Creek
The Trail

If a location is discovered, the Germans may bring troops onto the table at those locations within their deployment zone. If none of them are discovered, the Germans must come in on the main road and within 6" of either side.

Reinforcements: On turn three, the Germans may bring the third squad onto the table. The German platoon commander may make 2 last recon attempts to discover an entry location, or may use a location physically controlled by the German force. The U.S. Player may attempt to call for armored support by making a Skill Check (easy -1) by the radioman (considered specialist).

Each side is allowed one pre-game meeting to allow platoon commander's to give their initial orders and describe a battle plan. How they do this and what they decide is up to them, but their objectives are established by the scenario. This important because during the game, platoon commanders are not allowed to communicate instructions to their squads without sending runners. Runners can be sent to a squad. To do so, the player must measure to the squad leader he wishes to talk to, then he must measure the distance and spend the correct amount of Activations to send the runner (using the Command and Control rules from Point Blank). The runner is placed next to the squad leader for that Activation, and while there, the platoon commander may actually talk to the squad leader. After this Activation, the runner is automatically returned to the platoon HQ.

We also used rules for limited mortar ammo. The 60mm mortar squad arrives on the table with only 3 of each kind of round (smoke and HE). The mortar player must then send ammo bearers back to get more ammo during the game. This works by allowing an ammo bearer to go get ammo within a certain distance of the table edge during his Activation, and then return with 3 rounds. It is generally pretty easy to keep the tube supplied, but the ammo is not unlimited for the game.

The last special rules we used was ranging mortars. This allowed a mortar team to establish bonuses for firing on the same targets during the game. This was recorded on a special range card. This allowed the mortar team to dial in on a target and land more accurate rounds as the game went on...unless the target moved. Because the mortar team mostly fired smoke during the game and then got wiped out...this didn't seem to come into play!

Finally, we allowed platoon commanders to "give away" up to their T&E bonus in Activations to other players under their command at the beginning of each turn. This came in very handy at certain points in the game!

Once recon is complete, both sides rolled for Initiative. The winner decides whether his force deploys or the opponent.

The Game:

The pre-game recon went horribly for the Germans. And by horribly, I mean that there was not a single location successfully discovered AND all three scouts were lost.

The Germans also lost initiative to start.

The game began with the Germans piling their squads along the main road. Thankfully the U.S. were not in good positions to cover them with fire yet, so there was some room to shake out into better terrain.
Neffe,
The Germans began their assault by sending a rifle squad over a hill and towards a gully with the trail, where hopefully they would be able to stay out of sight of U.S. troops moving into town until close enough to assault.
Skirmish line.
Both Panzer IVs advanced down the road but turned off to the left side of the road and down into the depression towards the creek. There they tried to acquire U.S. units coming into town. With another round of bad rolling, they failed miserably to find their targets.
Germans use a Panzer IV to advance.
The Panzer IVs were being used by an infantry squad as cover as they advanced. The HMG team deployed along the road and began to pound away at U.S. infantry moving into town. This would prove to be one of the more effective units on the German side.

The U.S. quickly moved their troops into the town of Neffe and sent a squad towards the bridge. The push towards the bridge is assisted by the smoke from the 60mm mortars which put down a nicely targeted and dense smoke screen.
U.S. advance on the bridge using smokescreen from the 60mm mortar.
As the turns progressed, the Germans attempted to push over the hill and towards the town using the trail valley and the woods as cover. However, several U.S. riflemen in the two story building in Neffe  pounded the German squad with heavy, accurate, and deadly Garand fire. The German squad leader went down followed by two more German riflemen. They had barely even had a chance to return fire. Had the advance been coordinated better, the German LMG team might have been better placed to put fire on the U.S. riflemen. As it was, the German rifle team went into action unsupported due to the timing and the lay of the terrain.

The German squad in the middle along the main road started to put pressure on the U.S. troops in the town, but also began to take casualties of its own.

Meanwhile, one of the Panzer IVs came to life and started blazing away at U.S. targets, first in the barn of the middle farm, then in the village. To deal with this armored threat, a U.S. bazooka team fired at the Panzer IV and knocked a track off, immobilizing it for the game.
Immobilized Panzer IV.
The U.S. have been busy as well, bringing heavy rifle and LMG fire onto the German advance. By now, the third turn has arrived and the Germans managed to recon a new entry and then brought their third rifle squad onto the table as reserve. They would need it. The U.S. attempted to call for armored support, but could not get through. They tried again right away next turn and American Shermans arrived in the nick of time. However, before the U.S. players knew what happened, one of the Shermans was destroyed by the German Panzerschreck team. A duel between the remaining Sherman and the two Panzer IVs began.
Brew up! A Sherman goes up in flames.
On the right of the German side, a brave LMG gunner stepped out behind a wrecked U.S. ambulance and began blazing away at U.S. riflemen in the village. He is pinned by return fire, but not before he was able to cover the advance of a lone German riflemen who ran up to a building housing a U.S. bazooka team and put a grenade into the window. The blast killed the assistant and the gunner ducked out the back. German HMG and LMG fire has begun to have an affect on the U.S. troops in the town, but they are still in a solid position and the Germans are losing the steam needed to take the town.
 On the German left, the recently arrived rifle squad tried to push towards the bridge only to be pushed back into the woods by the U.S. troops that had made it to the bridge under the smokescreen.

For some unknown reason, the U.S. moved up their 60mm mortar team to the farm in the middle. From here they were greeted by the immobilized Panzer IV with several HE rounds from the main gun and withering hull MG fire. The 60mm mortar squad is all but wiped out.

In the tank duel, the Panzer IV landed a killing blow on the second Sherman and sent the turret skyward in a ball of fire.
"Hey sarge, what are we doing here? Isn't that a German tank over there?"
With the German advance checked on both sides, the battle starts to die down. The U.S. took some casualties but were able to hold the village (though their platoon HQ never set up a CP, but that was because of a miscommunication on my part in describing the U.S. objectives to the players). They did take and hold the bridge. The Germans were unable to kill enough U.S. troops, but they did destroy both Shermans. However, they failed to take any other objective.

The end of the game saw the U.S. in a better position than the Germans.

All in all, it was a very fun and intense game, with some very heroic moments as well as some tough fighting. The players generally didn't use the platoon runner communication rules.

Thanks to the guys at the club for playing. Chalfant, Tony, Greg, Dieter, Rob, and I had a good time. We could have used an extra 2 players, but made do with what we had.

I look forward to the next big platoon level game with Disposable Heroes: Point Blank. The rules play fast with each player controlling a squad, and with a large table, the ground scale looks pretty good in 28mm.