Showing posts with label Disposable Heroes: Point Blank. Show all posts

Thursday, November 13, 2014

Green Hell!

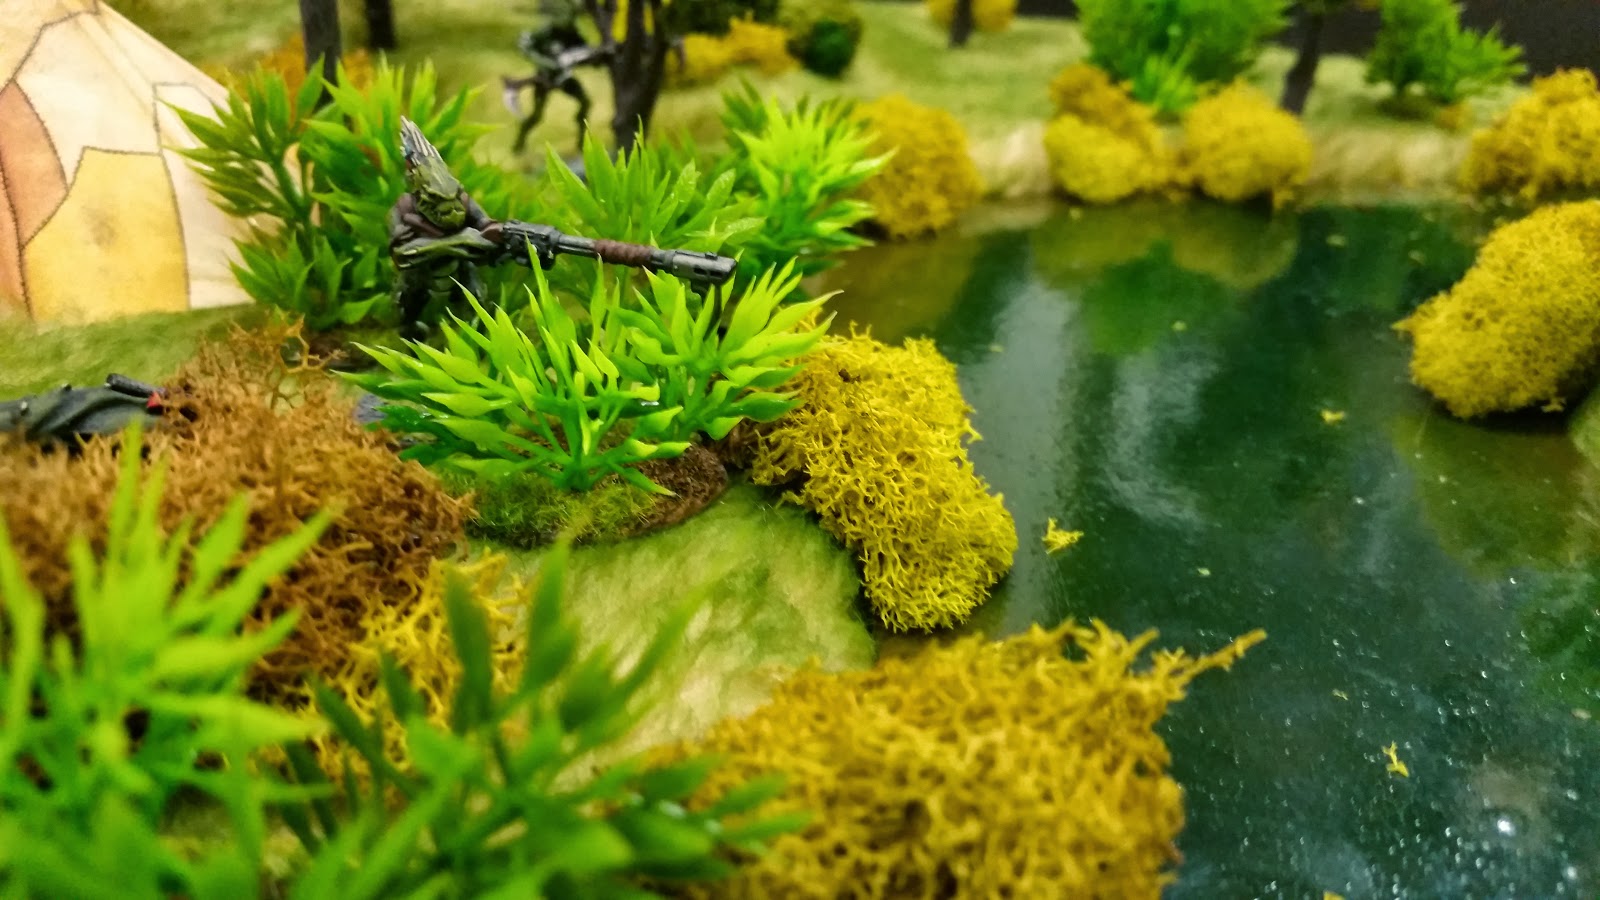
Welcome back. Now that I finished some jungle terrain on my own custom bases, I decided to use them in a game. I have a small force of Kroot painted and we decided they would go best up against a unit of Crimson Fists scouts. My friend had brought along some of his old Gorka Morka cardboard terrain with him and we thought it would make perfect tents for a Kroot encampment. We decided that the scouts should be on the attack attempting to ambush and destroy the xenos camp. We also decided that the prey should have some special skills of their own. As before, we used Disposable Heroes: Point Blank. This time, we used the spotting and hidden rules from the optional rules section in the back of the book.

We gave the Kroot a few jungle fighter type skills to fit the scenario. As jungle fighters they were given a -2 to all enemy models trying to spot them. During their Activation, they were allowed to ignore the first action that would normally cause a spot counter to be added (such as shooting or moving). Also, the normal automatic spotting distance was reduced from 12" to 9". This made the Kroot tough to spot, More agile in stealth, and better at blending into the terrain.

These rules would prove to add some great flavor to the scenario and made for some tense action. I was very happy with the way the scenario played. It was very cinematic.

The scenario started with the main group of Kroot on one side of the river set up in their camp. They had two lookouts posted outside the camp up on tall rock formations. On the other side of the river, the Kroot had two patrols of a Kroot and a Kroot hound each. These patrols would be randomly patrolling during the game. The Crimson Fist scouts would enter from the far side of the table on the opposite side of the river from the camp.

The first few Activations went well for the scouts. They moved into positions on both sides and advanced their Heavy Bolter onto a rock outcropping in the middle overlooking the Kroot camp. Everything seemed to be going well, with the scouts moving into position to attack the roaming Kroot patrols on both sides...until one of the Kroot patrols spotted a scout. He fired off a round at the scout from his long rifle, but missed and then sent the hound at the scout. The scout snap fired at the hound and killed it, and the unleashed a volley of Bolter rounds into the Kroot, killing it as well. 

Unfortunately for the scout, the camp was now alerted and they spotted the scout almost immediately. On the other flank, the scout sergeant and another scout rushed forward through a jungle defile to get into range of the other Kroot patrol. They were spotted, but much like the other side of the jungle, the scouts killed a hound on a snap fire and dispatched the Kroot patrol with a rush and volley of bolt pistol rounds. Now things began to heat up. The Krootox with a gunner riding on top strode out of the camp and began looking for the scouts who by now had added several spot counters to themselves by firing their weapons and moving. So much for stealth...

Both sides began to actively try to spot the other as they moved towards the river. The Krootox spotted the scout sergeant and began unleashing deadly hails of blast through the jungle. The scout sergeant took a wound from this fire, but pushed forward to the river edge. On the other side, several Kroot came down from the camp and started shooting at one of the scouts picking his way forward. Under normal circumstances, the scouts would have dominated the Kroot with superior firepower and accuracy. The problem was that the Kroot made good use of their jungle fighting skills of being able to ignore their first spot counter and get off lots of shots that would normally have made them easier to spot. The Kroot also made great use of the sharing Action Points rules to allow several Kroot to fire at one time without endangering their hidden positions by adding spot counters.

The scouts found that the river edge spit death at them from many locations without revealing the Kroot warrior's positions. Frustrated, the heavy bolter scout tried in vain to draw beads on Kroot targets from his superior vantage point. Finally, after taking fire for several turns and having much difficulty returning fire at the ghosts over the river, the Krootox was spotted. Swinging his heavy bolter around the scout unleashed a deadly hail of fire, felling the beast and rider. Despite this, the Kroot remained elusive. The scouts pushed right up to the edge of the river to try to get within automatic spotting distance, but here again the Kroot player fell back out of spotting range just enough to remain invisible. Kroot warriors would be spotted from time to time, and a few were killed by lucky shots from the scouts, but the Crimson Fists were in no position to advance across the river. And by now, they had taken several wounds.

After a few rounds of this deadly exchange, the scouts were becoming bogged down in a firefight with ghosts they could not pin down. During a particularly vicious round of firing from the Kroot, the scout sergeant and two other scouts are killed. This prompts the remaining two scouts to withdraw from the fight. The heavy bolter provides cover fire while the other scout falls back out of sight of the Kroot. Then, under heavy fire himself, the heavy bolter climbs down off the rocky outcropping and escapes.

That night, as the moon rises over the caopy of the jungle, a Kroot shaper leads his warriors in a victory celebration with a feast of the flesh of man. The Crimson Fists learned a valuable lesson in warfare. Never underestimate an enemy in his home terrain. The Kroot, while not near as skilled in combat, and fighting with much more primitive weapons, were able to fight and kill even the Emperor's finest with cunning and skill. The hubris of the marines was their downfall.

The game was a great, tense, nailbiter of a scenario. It made a great story and played out very cinematically. As the scout player I really felt like I was chasing ghosts. I just couldn't spot the enemy, and they were almost continually able to spot me. I could just see the scouts peering out from the river edge only to be met by deadly fire from everywhere around them, Their best asset, the heavy bolter, even in a good position, was unable to help them.

It was a great game, and I look forward to more Point Blank in the Warhammer 40,000 universe.

The Kroot encampment.
A Kroot patrol spots a scout!
All stealth is lost as the sergeant wades into the fray.
The heavy bolter moves into position, only to find...nothing.
The Krootox moves into action, spitting death at the scouts.
Firing from the cover of the river edge, the Kroot pin down the scouts.
A scout advances towards the river.
The heavy bolter covers the retreat of his brother scout.
The Kroot feast tonight!


Tuesday, September 17, 2013

Massacre Outside Dubno

During Operation Barbarossa one of the largest tank engagements of the war took place during the Battle of Brody. It was a massive counterattack by the Red Army with an armored force of as many as 1,000 tanks. The Germans were taken by surprise and caught on the wrong foot while on the move. The Soviet 8th Mechanized Corps had initial success taking the town of Dubno (West of Brody), but by June 26th, the Germans had regrouped and pushed back. 16th Panzer Division first encircled, then routed Soviet tank units of Popel's Group forcing the Soviets to withdraw by July 1st.

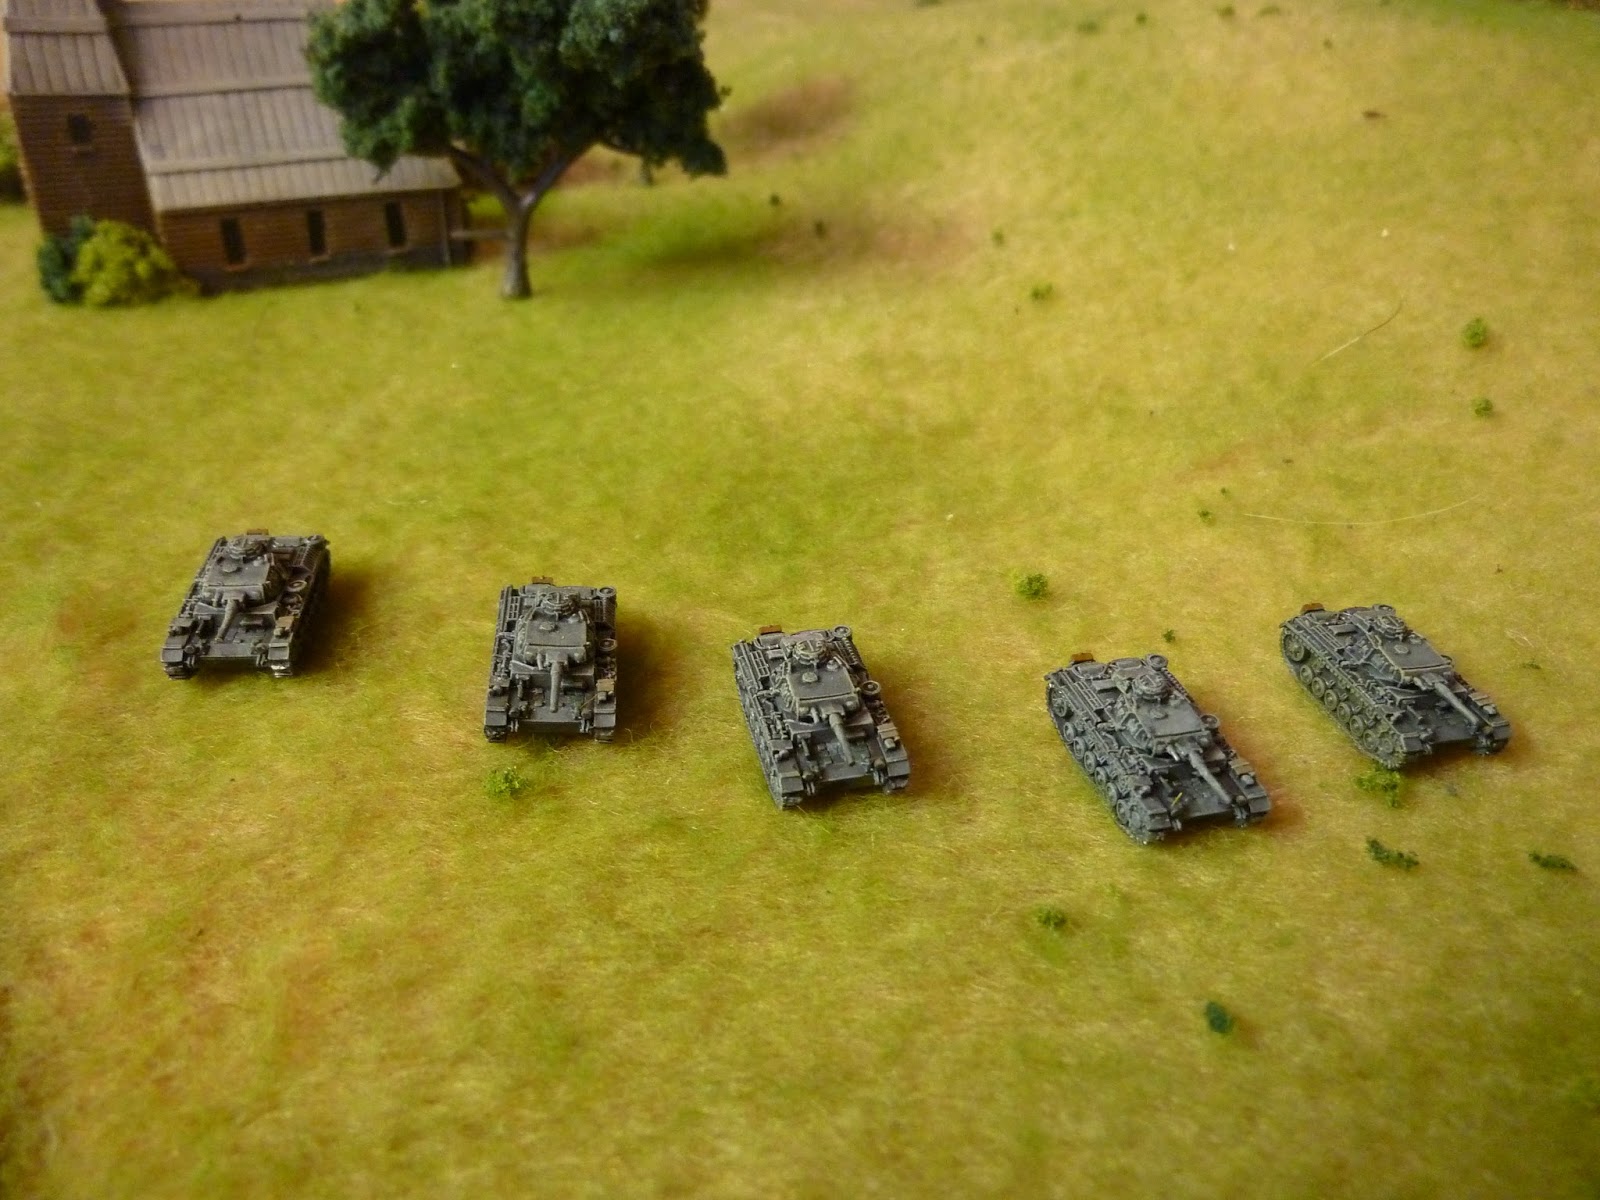
I decided to fight a small tank skirmish from this battle using my 6mm Panzer IIIs and Soviet T-26s. I wanted to pick a battle that had the Soviets on the offensive and the Germans slightly off balance. Reading through some of the opening battles of the Barbarossa Campaign, I came across reference to the Battle of Brody and decided it would be perfect.

The game turned out to be a massacre for the Soviets.

I used Disposable Heroes: Point Blank to fight this all tank micro armor game. Point Blank is great for those detailed tank engagements where each player controls a platoon of tanks. It allows for keeping track of ammunition, damage, crew losses, and other details.

The tanks are all 6mm (1/285th scale) from GHQ. I used a ground scale of 3"=25 yards.

Special Rules for Point Blank Tank Battles:

Tank Formations: Tanks can operate in formations, with a set range of distances between each tank. This distance is listed below and no tank can be further than the formation distance from another tank it the unit. Also, the tank formations start the game in either column, wedge, V, or Flank (left/right). Once the battle began, the platoons could move as necessary outside this initial formation shape as long as they maintained the proper formation distance during the rest of the game. The roll for initiative at the beginning of the game also determined which formation a platoon would start the game.

German tank formations (Command Distance) could be anywhere from 3" out to 15" (25-125 yards). The German tanks had radios, could use more open formations, and did not have to be within LOS to act as long as they were within Command Distance.

Soviet tank formations (Command Distance) could be anywhere from 3" out to 9" (25-75 yards). Soviet tanks did not have radios at the platoon level, so they used flag signals. They could also not operate out of LOS of their platoon leader. Any Soviet tank that found itself out of LOS of its platoon leader had to take a Skill Check (Difficult -4) to use Action Points.

I allowed all tanks to share Action Points during an Activation as long as they were within formation. Also, if a unit was moving in column, as long as no tank in the platoon attempted to acquire a target, did not fire, reload, or take any other action, the whole platoon could move up to the column leader's fast speed with the lead tank moving no further than the fast speed and the rest of the tanks in the platoon in a line behind. This allowed for a reserve move (especially down roads), but could pose a danger if the enemy was nearby to exploit the bunching rules in Point Blank.

Lastly, I used the Ammunition Ready Rack rules and gave each tank a select number of rounds in their ready racks ready to go. Any tank that ran out would have to reload their ready racks before being able to fire again.

The forces involved were as follows:

Germans:
Platoon of Panzer III F/G with 5cm gun. Ready Rack: 8 rounds.

Tank 111* (Platoon Leader)
Tank 112
Tank 113
Tank 114
Tank 115

Platoon of Panzer III F/Gs with 5cm gun

The German crews had the following stats:

Accuracy: 5
Guts: 10 (Lt.), 9 (Sgt.), 8 (Crew)
T&E: +2 (Elite)
Activation Pool: 12

The Platoon Leader tank was commanded by the Lt., while the rest of the tanks were commanded by Sgt.s.

Soviets:
2 Platoons of Soviet T-26 1939. Ready Rack: 5 rounds.

Tank 1* (Platoon Leader)
Tank 2
Tank 3
Tank 4

Tank 5* (Platoon Leader)
Tank 6
Tank 7
Tank 8

Platoon of T-26 1939

The Soviet crews had the following stats:

Accuracy: 5
Guts: 8 (Lt.), 7 (Sgt.), 6 (Crew)
T&E: 0 (Trained)
Activation Pool: 8

The Platoon Leader tank was commanded by the Lt., while the rest of the tanks were commanded by Sgt.s.

The table. A farm outside the town of Dubno. Top is West

The game began with a roll for Initiative. The winner of Initiative would be allowed to choose to go first or second, and would be allowed to set up anywhere on his side of the table within 10" and in any formation. The loser would be forced to deploy first and in column on a road on his side of the table within 10".


The Germans won the roll for Initiative. The Soviets deployed first, and the Germans decided to take the first Activation.

Soviet tank platoon in column.

2nd Soviet Platoon in column heading East from Dubno.


Activation 1: Germans.

Tank 111 moves slow speed down the road to find the Soviet column in his view. The platoon leader tank Acquires the lead tank in the Soviet column, fires, and misses! The crew then reloads.

Activation 1: Soviets.

Tank 1 and 2 move forward at slow speed. Tank 1 Acquires German tank 111, fires, and hits the tank in the track. The round penetrates and damages the track, reducing the vehicle to slow speed for the rest of the game.

Activation 2: Germans.

Tank 111 moves slow speed right, fires at the same Soviet tank 1, and once again misses!

Activation 2: Soviets.

Tank 2 moves slow speed left next to the farmhouse. Tank 3 moves slow speed forward on the road.

Activation 3: Germans.

Tank 111 fires again at Soviet tank 1 and misses for a third time. Tank 114 moves up onto the nearby hill on the left and Acquires Soviet tank 3.

Activation 3: Soviets.

Tanks 5, 6, 7, and 8 all move fast speed in a column, going off road and swinging to the right and towards the hill.

Soviet column moves towards right hill.

Activation 4: Germans.

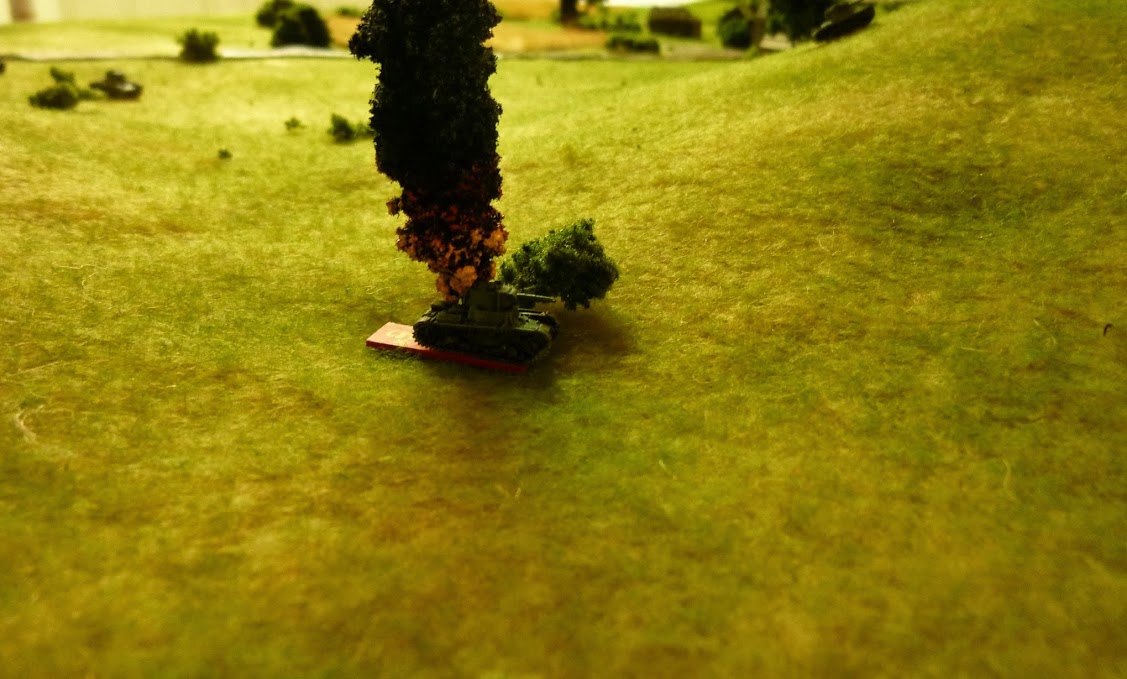
Tank 111 reloads, fires again, and finally hits Soviet tank 1. The round penetrates and the tank is brewed up. Some of the crew survive, but they flee to the rear.


Tank 114 fires and hits Soviet tank 3. The round penetrates with a catastrophic result! The vehicle is destroyed and the entire crew is killed. Two tanks in one Activation!


The massacre has begun...

Activation 4: Soviets.

With their platoon leader dead, the rest of the Soviet platoon take a Guts check. Surprisingly, the platoon passes the Guts check and continue the fight!

Activation 5: Germans.

Tank 115 and 112 move fast speed onto the hill on the left flank.


Activation 5: Soviets.

Tank 5 and 6 move up slow and medium speed towards the hill on the right.


Activation 6: Germans.

Tank 115 moves up slow speed to the edge of the woods on top of the hill on the left. The crew Acquire Soviet tank 5. They fire and hit! The round penetrates the hull and the resulting explosion sends another fire plume towards the sky.


Activation 6: Soviets.

The loss of another platoon leader sends the second Soviet platoon into a panic. The platoon fails their Guts check and tank 6, 7, and 8 full reverse towards their table edge. On the other Soviet flank, tank 2 passes a Skill Check to Activate after the loss of his platoon leader and succeeds. Tank 2 then moves slow speed into a position to spot the enemy, but fails to Acquire German tank 114.

Activation 7: Germans.

Tank 114 Acquires Soviet tank 2, fires and misses. The crew reloads, fires again, and hits. This time, the round penetrates and another Soviet tank is brewed up!


Activation 7: Soviets.

After also passing a Skill check to Activate, tank 4 moves onto the hill on the right, taking up a position on the flank of German tank 112. The crew fails to Acquire their target.


Activation 8: Germans.

Tank 112 fails it's Acquisition roll to spot the flanking maneuver of Soviet tank 4, so the crew cannot react to this new threat. However, tank 115 moves medium speed across the low depression between the hills on the right and takes up a position on the hilltop within view of the Soviet platoon that was withdrawing from the battle. The crew Acquires Soviet tank 7. They fire, hit, and using their elite crew skill, move their hit result from a track hit to a hull hit. The round penetrates and once more, a Soviet tank bursts into flames!


Activation 8: Soviets.

Tank 4 now Acquires German tank 112. The crew fires, hits, and penetrates with a major damage result to the track. The Soviet crew decides to reload and fire again to make sure their target is destroyed. This time, the round hits, penetrates, and causes a catastrophic internal explosion! The Soviets have gotten their first, and only kill of the battle. This is also the last Activation from their Activation Pool for the Soviets this turn. From here on out, the Germans can Activate the rest of the Activations from their pool.


German Activation 9-12:

 It's pretty much over for the Soviets. The Germans maneuver a few more of the tanks in their platoon into firing positions or towards the objective. Tank 115 moves into a position to Acquire, fire at, and knock out Soviet tank 8. At the end of the German Activations, the game is called.

The Germans advance on Dubno farm.

German positions at game end.

Results:

What a massacre!

 Soviet Losses:

Tank 1* Platoon Leader
Tank 2
Tank 3
Tank 5* Platoon Leader
Tank 7
Tank 8

Massive losses, and all but one tank was a catastrophic explosion of the vehicle and the death of the crew.

German Losses:

Tank 112
Tank 111 damaged

The Germans clearly won a major victory here. The Soviets not only lost the Initiative to start the game, but the German gunnery was excellent. Other than the German platoon leaders first few shots, the Germans hit and penetrated everything they shot at. Their 5cm guns sliced through the T-26 likes a hot knife through butter. The only bright spot for the Soviets was the T-26 that was able to sneak onto the flank of 112 and get two nice solid flank shots. The Germans were surprised by the move, but they were otherwise in too powerful a position by the end of the turn for it to make a difference.

There you have it! A single turn of Disposable Heroes: Point Blank as an all tank skirmish using micro armor. Games of Point Blank move fast and the action is furious. This battle ended up pretty one sided. The Soviets just couldn't seem to stand up against that expert German gunnery in this game. Still, they were not completely incompetent. Despite the loss of their platoon leaders, at least a few of their tanks attempted to maneuver and engage. Sometimes, that's just the way combat goes.

I love the early war period, where even a 5cm gun can dominate the battlefield. If only the Soviets had brought along a few of their T-34s. Maybe next time they will when the Germans try to push on past Brody...

For now, the 16th Panzer Division rides forward in victory.

Thursday, July 11, 2013

It's Dangerous out in the Wastes...

Hello folks, long time no see! It's been a busy summer with lots and lots of gaming, painting, swimming, hiking, fishing, and generally having fun with the family and little time for posting on the blog. Until now...

I had a chance to get together with an old friend who I don't see often enough, and who is pretty new to gaming outside Warhammer 40,000 (which he hasn't played since 4th edition-nor have I). We have been getting together more often recently and I talked him into a game using my Pig Iron sci fi minis and using Disposable Heroes: Point Blank.

The scenario is an Outlander (previously miners) ambush on a Federalist Militia troops convoy. I wrote the scenario with a random element of determining attacker and defender. Both players roll a D10, add their T&E score and consult a chart. The winner determined who was ambushed and the difference in the rolls determined the set up and starting positions of the forces on the table. This difference allowed for a meeting engagement (on a tie roll) to a perfectly executed ambush with hidden forces and a completely unprepared enemy. Both sides could potentially be the ambusher, though the Outlanders had the edge due to their T&E bonus.

I posted some pics of the forces involved before here.

The forces were the miners (I call them Outlanders) from Mining Unit 454 and the forces of the Federalist Militia. I envision the Outlanders as tough, experienced, and wily opponents used to hardships and brutal life and combat in the wastes. They are expert ambushers and use concealment, subtrefuge, and hit and run tactics to win against their foes. Their weapons are durable, simple, and easy to maintain, though not very high tech. They have no higher support weapons, no communication networks and no supply chain. They are humans though, and though their outward appearance, and reputation, casts them as inhuman mutated monsters, they are actually normal humans. They live a harsh, but noble life and use the fearsome reputation of their savagery to scare their Federalist enemies. A select few of their population are actually powerful shamans who can control the weather and elements of their Outland environment (they are rumored to be able to summon and control the dead-called wastewalkers-but this is unconfirmed). The most powerful of these shamans can cause psychic shocks and conjure powerful winds of the wastes, as well as telepathically communicate with their comrades. Unlike the Outlanders, the Federalist Militia are conscripts pulled from the vast reaches of the human Galaxy. They are often undertrained, underpaid, young, scared, and unmotivated to fight for an empire that is always waging an eternal war across some lonely speck of a planet on the wrong side of the Milky Way. They have the best weapons, equipment, vehicles, and support in the galaxy. Their communications, logistics, and heavy support network located on orbitally based ships is impressive enough. However, at the end of an Outland day on the dark side of the planet, they are still unmotivated troops fighting against a determined enemy on a planet the conscripts never heard of and don't want to die on.

On to the game! I allowed my friend Tom to choose, and he liked the look of the Outlanders, so I took the Militia.

For the scenario, we rolled off and ended up with the Outlanders ambushing the Federalists. The scenario is based on an Outlander assault on a supply convoy. One of the results of the chart is the possibility of a Federalist trap based on a fake convoy loaded with explosives. This result did not come up in our game, but I like the possibility that it can.

The game began with the Outlanders deploying on either side of the convoy which was allowed to be set up by me at one edge of the table along the road running down the middle of the table through the blasted remains of an ancient human town.

Here are some pics of the action with captions to tell what happened. I wish I had gotten more quality pics, but all I had was my phone. Hope you enjoy!

The game was a minor Outlander victory. They captured some of the supplies, but despite some casualties, the Federalists ended up holed up inside the town, most likely calling for reinforcements. The Outlanders beat a hasty retreat to the wastes to fight another day!


 The convoy picks its way carefully through the ruined town, wary of the hills and likely ambush spots. Their scanners are running hot, with life signs coming in nearby...


From their position on the hill, the Outlanders prepare to fire on the convoy...


 The Plasma cutter gunner charges up his weapon and blasts two perfectly aimed shots into the sides of the supply trucks, killing the driver of each truck and bringing the convoy to a screeching, charred, and fiery halt.


The Militia platoon leader issues the bailout order. The ramp drops and half a squad of militia run out...


And right into the face of a mining hard suit attack! The Outlanders have rigged their old mining suits, excellently armored and easy to modify, into armored fighting suits equipped with flamethrowers and plasma drills. The mining hard suit rushes over and easily chops a gaping hole in the cab of the militia Armored Personnel Carrier.


 BOOM! The APC goes up, with the rest of the surviving squad bailing out the back. The Militia Squad Automatic Weapon immediately goes into action against this threat and several rounds penetrate the armor of the mining hard suit. Despite the fire, it's not out of the action yet!


The Outlanders pour fire and merciless shamanic attacks of psychic power at the Militia. Several militia are cut down or suppressed. 


The Shaman then conjures up some of the dreaded wastewalkers to his aid and sends them at the enemy. The Militia manage to cut down a few before they reach their lines, but one gets through and eats an unfortunate Militia whose gun had jammed and who had been suppressed by the shocks of the shaman's attack. Up near the front of the column, the SAW gunner destroys the mining hard suit in a hail or hardened armor piercing slugs. However, his comrades at the rear begin to take withering return fire.


Outlanders pouring fire down into the enemy...


The reason for the ambush? Supplies! The Outlanders pull a truck along side the convoy which had been disabled by the plasma cutter's shooting. They perfected this tactic of using one of their own trucks to pull alongside convoys because the Militia had developed security measures that automatically shut down Federalist systems on board trucks to prevent them from being used by the enemy. A commanding officer could request an orbital system link to shut down any system feared to be captured or used by the enemy. This was also a handy method of calling for direct orbital fire support on the GPS tracked trucks. The Outlanders knew from experience that the Federalists were perfectly willing to fire down onto their own equipment and obliterate any Outlander foolish enough to stick around too long to loot.


"Just pull up here and I'll unload!"


The end of the game. My friend Tom (seen here) wins a small victory over my hard pressed Militia. I cut down the mining hard suit, shot up an Outlander truck (not pictured) that tried to make a dash towards the convoy, and I secured a pretty tough position in the ruins of the town. From there, Tom found there was little chance the Outlanders were going to win the fight by assaulting me. Turns out, they didn't have to...the position of the supply trucks outside the town at the rear of the convoy meant Tom was able to sneak up and steal some of the supplies. However, he was only able to make it off the board with one truck's worth, since the other truck was well covered from the positions in the town and he wasn't willing to risk any more casualties to my fire.

It was a great, tense game with a good friend.


Saturday, December 29, 2012

The Undefeated: The 10th Motorized Cavalry Brigade vs. the 4th Light Division AAR.


Ambush Along the San River

September, 1939. German troops have crossed the Polish border and are smashing their way through Polish defenses with massive air and artillery support. Hard pressed everywhere, Polish troops fought hard to delay German advances so that the French and British, who "guaranteed" Polish borders against German aggression, would declare war against Germany. The Poles would fight in vain.

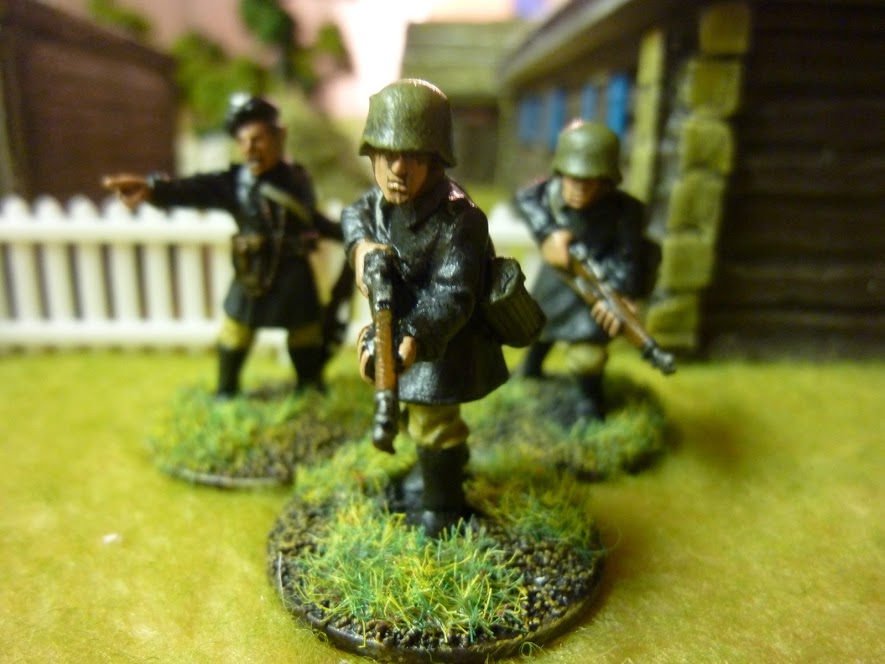
The Early War has fascinated me for a long time. The valiant stands of Polish, French, Belgian, Dutch, Danish, and Norwegian troops is a study of the "Futile Gallantry" of the early phase of WWII. One Polish unit in particular stands out: The 10th Motorized Cavalry Brigade. This tough unit fought intense defensive battles around Lvov against the German panzers of the 4th Light Division, 2nd Panzer, and delaying actions in southern Poland against troops of the 1st Gebirgsjagers. The unit became so adept at ambushes along the pine ridges of the Beksides mountains that German troops became fearful of the ever present danger lurking behind the trees.

As I posted about previously, I recently picked up a platoon of these troops from the new range by Blitzkrieg Laboratory (released through Gorgon Studios). I ran a game using these troops at the last HMGS East convention, Fall In 2012, but I forgot my camera and my phone battery died, so I never got any pics. With the end of the semester (I teach, and I'm a PhD student), I had some time to put together a game and get some good pics as well as do a more detailed after action report.

The battle was between German motorized troops of the 4th Light Division up against the Polish 10th Motorized Cavalry Brigade.

I used Disposable Heroes: Point Blank. This AAR will be the first of a series of battles using these rules to demonstrate not only how the rules work, but how adaptable they are for all kinds of conflicts, periods, and tactical engagements. From WWII infantry battles, to Vietnam, modern, and all tank battles using 1/285th (6mm) minis, Point Blank is a system that allows you to do all kinds of games.

The game table layout:


The map depicts a small farm near a bridge over the San River (more of a creek here, really). The Germans are attempting to push along the river and capture the high ground around the farm as well as push recon and motorized troops across the creek. The Poles are attempting to stop the Germans by knocking out their mobile units.

The Objectives:

German: Capture Hill (2), Hill (3), and the bridge. The farm is a secondary objective.

Polish:  Knock out, immobilize, or drive off any German tanks or vehicles. Preventing capture of bridge and hills are secondary objectives.

The Forces:

Polish:

ACC: 5
CC: 6
Guts: Corporal (9), Lance Corporal (8), Private (7)
T&E: Elite (+2)

Rifle Squad (Player 1):
1 Corporal w/Wz98 Rifle
LMG Team:
1 LMG Gunner w/Wz28 LMG
1 Assistant w/Wz98 Rifle

AT Rifle Team:
1 AT Rifle Gunner w/Wz35 AT Rifle
1 Assistant w/Wz98 Rifle

1 Lance Corporal w/Wz98 Rifle

LMG Team:
1 LMG Gunner w/Wz28 LMG
1 Assistant w/Wz98 Rifle

3 Riflemen w/Wz98 Rifles

Tanks and Support (Player 2):
3 TKS 20 FK w/20mm Cannon

AT Gun Team:
1 Gunner w/Bofors 37mm AT Gun
1 Lance Corporal Assistant w/Wz98 Rifle


TKS 20 FK and Bofors 37mm AT Gun.
German:

ACC: 5
CC: 6
Guts: Sergeant (8), Corporal (7), Private (6)
T&E: Veteran (+1)

Motorized Infantry Squad (Player 1): 

1 Sergeant w/MP-38 SMG

LMG Team:
1 LMG Gunner w/MG-34 LMG
1 Assistant w/Kar-98k Rifle

LMG Team:
1 LMG Gunner w/MG-34 LMG
1 Assistant w/Kar-98k Rifle

5 Riflemen w/Kar98k

Opel Blitz Truck

Motorized Infantry Squad (Player 2):

1 Sergeant w/MP-38 SMG

LMG Team:
1 LMG Gunner w/MG-34 LMG
1 Assistant w/Kar-98k Rifle

LMG Team:
1 LMG Gunner w/MG-34 LMG
1 Assistant w/Kar-98k Rifle

5 Riflemen w/Kar98k

Opel Blitz Truck

Tank Support (Player 3):
2 Panzer I B
2 Panzer II B

Motorized Rifle Squads.

Panzer Is and IIs.
Deployment:

The Germans must come on the table on the road. However, they are allowed some pre-game recon to find alternate entry points on the table. If these are successful, they may allow the Germans opportunities to change the deployment. The Poles can deploy anywhere on their half of the table. However, they do not set up before the game starts, instead, they deploy by Activating a soldier, team, or vehicle and placing it on the board. No model or team may deploy closer than 16" to a German soldier, team, or vehicle. 

The game begins with recon rolls for the Germans. I took the recon chart from the Disposable Heroes & Coffin for Seven Brothers book (page 45) and used it to allow the German player the chance to reveal different approaches to coming onto the table during the game. If the Germans rolled well enough, they would be allowed to enter the table in more advantageous locations. If they rolled really well, they would have been able to outflank the Polish positions. Recon, however, involves risk, and each player had to allocate an infantryman or tank to act as a scout to enable the players to roll on the table. If the roll went badly enough, they could be killed or destroyed.

I Followed the chart on page 45 of Disposable Heroes & Coffin for Seven Brothers and used the "Light Tank/Infantry" column. I also used the Chance to be Destroyed column as well. If a roll was high enough, the scouting model may have been killed or destroyed (removed from game). If a roll was a success, it allowed for a better German deployment on the table at the start of the game. The German players did not have to use the newly revealed recon location, but it is an option.

1st Success: German player allowed to deploy up to 12" along right hand table edge (Hill 3) up to 6" away from the edge.

2nd Success: German player allowed to deploy up to 12" onto the table, between river and Hill 2.

Success 3: Outflanked! The German player allowed to deploy on the road along the Polish deployment edge on the left side, up to the bridge (but not on it).

The Game:

The game started off with a roll for recon, which resulted in the German's achieving two successes. They decided to take advantage of the 2nd success and advance a squad along the hill.The Germans suffered no losses from the recon rolls (though there were some close calls).

Next, Initiative was rolled, with a tie: Germans (8 Guts + 7 + 1 T&E=16) vs Poles (9 Guts + 5 + 2 T&E=16). Since it was a tie, but the Poles have a higher T&E, they won initiative. The Poles decide to allow the Germans to go first since they wanted to hold back forces for the ambush.

German Activation Pool: 9 Activations (8 Guts + 1 T&E).

Polish Activation Pool: 11 (9 Guts + 2 T&E).

German Activation 1: (this Activation allows the Germans to place their forces on the table within 6" of the edge or using one of the pre-game recon locations-all subsequent Activations will be with individual soldiers, teams, or vehicles): The Germans move an Opel Blitz truck with a Motorized Infantry squad on board down the road 12". Half of the squad disembarks. The other squad arrives on the table dismounted without the Opel Blitz. They take advantage of the cover of the hill revealed by the successful pre-game recon. Next, a Panzer I moves down the road 16" towards the roadblock (a wagon pushed across the road). This move provokes a snap fire by the Polish AT rifle team. They hit the Panzer I but fail to penetrate.

Dismount!

Polish Activation 1: The now revealed AT rifle team reloads and takes another shot at the Panzer I. They hit and penetrate, killing the commander and inflicting light damage to the tank. The driver passes his Gut check. The AT rifle team then reloads.

Next, a hidden Polish Bofors AT gun fires at the Opel Blitz with infantry on board. They Acquire, hit, and heavily damage the truck. The driver and his assistant is killed outright and the rest of the squad bails out. The AT gun then switches targets to the infantry squad that has dismounted.

Bail out!
German Activation 2: A German LMG team moves up to the cover of the wrecked car and puts some fire on the Polish AT gun while some of the riflemen move up to the cover of the trees along the side of the road.

A German corporal, which had taken advantage of the advanced position along the hill moves towards the Polish AT gun and throws a grenade. The blast does not harm the AT gun crew and they keep their nerve.

The damaged Panzer I, with a dead commander, decides to reverse at fast speed off the table and withdraw from the battle.

Polish Activation 2: The Poles reveal an LMG team in the barn which opens up on the German infantry dismounted from the truck. They kill the Sergeant and suppress the LMG team.

German Sergeant goes down from Polish machine gun fire.

The AT gun fires at the German infantry as well, and suppresses the Corporal of the squad. Both leaders had been at the front of the column when they dismounted. Leading from the front is dangerous work...

German Activation 3: The LMG team that had been suppressed by the fire coming from the barn rallies and hops over the fence to take cover behind the hay pile. They return fire to the Polish LMG team and suppresses them, though while firing their gun jams.

On the other side of the road on the hill, a German LMG team moves up and puts fire on the Polish AT gun crew. They kill the gunner and suppress the loader, though they also experience a jam.

At the same time, a Panzer I drives north of the road along the hill and attempts to find the AT gun to bring machine gun fire to bear. The crew acquire their target and pour fire into the AT gun position, driving off the crew by inflicting more than five suppressions.

Polish Activation 3: The Poles move up an LMG team to the position previously occupied by the AT gun crew, knowing the Germans will be pushing towards this objective. They draw a bead on the Germans approaching them along the hill and kill both the loader of the German LMG team and the Corporal of the squad. This fire also suppresses the machine gunner.

In a bold move by one of the TKS tankettes, the crew slowly drives around the curve of the hill until the German Panzer I is in view. Since they are within 12" they Acquire the target automatically. The TKS fires, but the two shots are glancing blows to the top part of the armor of the Panzer I.

German Activation 4: The Germans rally their LMG team and start to bring a crossfire onto the Polish infantry in the barn, suppressing them. Elsewhere, more German infantry move up along the hill trying to get into position to assault the Polish AT gun position.

A Panzer II arrives and finds the TKS in its sights. It scores a hit with its 20mm cannon, but the shot skims off.

Polish Activation 4: Luckily for the Polish LMG team in the barn, a nearby Corporal rallies them and gets them back in the fight. The LMG team puts fire onto the Germans position behind the haystack, but to no effect.

Now that they have the target zeroed in, the TKS pours 20mm fire into the Panzer I until it explodes.

Brew up!


German Activation 5: The Germans maneuver more of their infantry and put more fire into the barn, but to no effect.


The Panzer II fires at the TKS and misses.

Polish Activation 5: The brave Polish AT rifle team reloads, fires and misses the Panzer II.

Meanwhile, the game of cat and mouse continues. The TKS reverses back around the bend in the hill out of LOS of the Germans. Safe...for now.

German Activation 6: The German infantry along the road are trying to maneuver towards the barn, but having difficulty. Their move is covered by the Polish LMG team in the barn that snap fires on their move.

In the middle, the German infantry is having more luck and they maneuver the LMG team and the Sergeant towards the top of the hill. The Sergeant gets close enough to throw a grenade onto the Polish LMG team on the hill. The blast from the grenade kills the LMG gunner, but the assistant takes over.


Polish LMG team moments before a German potato masher lands among them and kills the gunner.
Pushing hard, the Germans move their second Panzer II, onto the table. It drives 16" along the left side of the hill, keeping an eye out for any lurking Polish tankettes...

Polish Activation 6: Having ignored the AT rifle team lurking under the wagon roadblock, the Panzer II on the road pays dearly. The AT rifle team fires, scoring a hull hit into a vital location, causing the tank to brew up with all crew killed.


AT Rifle ambush!
The Poles press their advantage against the German armor by revealing their second TKS high up on hill 3 in an attempt to knock out the remaining Panzer II. They Acquire the target, but when they fire the shots go wild, completely missing.

German Activation 7: The German infantry are getting aggressive. The LMG behind the haystack fires at and finally removes the threat of the Polish LMG team in the barn, while on the center hill, the German LMG team fires at and kills the remaining Polish LMG gunner. This allows the Sergeant to move up and secure the objective on the hill.

Turning in place to face its frontal armor at this new threat, the Panzer II Acquires the TKS on hill 3 and fires its 20mm cannon into the hull until it explodes in a ball of fire.


The Panzer IIs 20mm cannon makes short work of the TKS.
Polish Activation 7: The Poles in the farm are getting desperate, and begin taking rifle pot shots at the German infantry along the road. However, a lucky shot from one of the rifles in the farmhouse kills the German Sergeant who had just captured the hill.

The Poles need to destroy all the German tanks, so the first TKS rolls around the same bend in the hill and Acquires the remaining Panzer II. By turning in place, the Panzer II had left its vulnerable side armor exposed to the TKS. They get lucky with an engine shot from the side, which immobilizes the Panzer II and causes light damage.


Side shot!
German Activation 8: The Germans finally bring fire to bear on the Polish AT rifle team. They kill the assistant gunner, but the team is still in action.

Since the Sergeant was killed the LMG team moves up to retake the hill.

Now immobilized, The Panzer II turns its turret towards the second TKS who had knocked out its engine. They Acquire the target point blank, hit, score a blast against the crew and cause medium damage. Miraculously, the crew survive the blast, but are dazed by the concussion of the hit.

Polish Activation 8: Polish riflemen attempt to clear out the hill the German infantry just occupied, but their fire is ineffective.

Luckily, the crew of the TKS recover quickly. The gunner lets fly with a shot from the 20mm cannon while the driver jams it into reverse and speeds as fast as he can out of sight of the German Panzer II. The shot hits the Panzer II but does not penetrate its armor.

German Activation 9 (Final Activation of the turn): The German LMG team on the hill fires at the Polish AT rifle, with no effect, while German rifleman work their way up to support them.

The immobilized Panzer II does nothing else this turn.

Polish Activation 9-11: The AT rifle team, in a final move to finish off the remaining Panzer II, sneaks over to the stone wall along the road. They fail to hit the first time, but after reloading, their second shot hits the Panzer II in the lower hull. This shot penetrates and causes a catastrophic explosion, popping off the turret in a plume of fire and smoke.


BOOM!
Having achieved their objective of destroying or driving off all German armor and holding up the German advance, the Poles decide to withdraw from the battle. The Corporal gives the order to fall back, and the remaining TKS crosses over the San river to the safety of Polish lines. A squad of waiting Polish engineers will then attempt to blow the bridge before the Germans can secure it, and then place mines near the ford downstream to harass anyone that attempts to cross there.

Fall back!
The game ends with a Polish victory. They had suffered very few casualties, though their LMG teams took a beating and they lost a TKS.

The Germans took only one of their objectives. Though they could now advance on the farm and the bridge, they lost a truck and all of their armored vehicles. Their infantry squads took heavy losses in leaders. They will be sure to advance more cautiously now that the Black Brigade has dealt the 4th Light Division a blow they won't soon forget!

I hope you enjoyed this battle report! I really had fun playing this scenario. I hope it gives you some ideas for your own WWII games or even games of Point Blank!

Polish Miniatures are Gorgon Studios/Blitzkrieg Laboratory, with Warlord Games TKS tanks and AT.

Germans are all Crusader Miniatures, with Warlord Games tanks, and Army Group North trucks.

The houses are Old Glory.