Ambush Along the San River
September, 1939. German troops have crossed the Polish border and are smashing their way through Polish defenses with massive air and artillery support. Hard pressed everywhere, Polish troops fought hard to delay German advances so that the French and British, who "guaranteed" Polish borders against German aggression, would declare war against Germany. The Poles would fight in vain.
The Early War has fascinated me for a long time. The valiant stands of Polish, French, Belgian, Dutch, Danish, and Norwegian troops is a study of the "Futile Gallantry" of the early phase of WWII. One Polish unit in particular stands out: The 10th Motorized Cavalry Brigade. This tough unit fought intense defensive battles around Lvov against the German panzers of the 4th Light Division, 2nd Panzer, and delaying actions in southern Poland against troops of the 1st Gebirgsjagers. The unit became so adept at ambushes along the pine ridges of the Beksides mountains that German troops became fearful of the ever present danger lurking behind the trees.
As I posted about previously, I recently picked up a platoon of these troops from the new range by Blitzkrieg Laboratory (released through Gorgon Studios). I ran a game using these troops at the last HMGS East convention, Fall In 2012, but I forgot my camera and my phone battery died, so I never got any pics. With the end of the semester (I teach, and I'm a PhD student), I had some time to put together a game and get some good pics as well as do a more detailed after action report.
The battle was between German motorized troops of the 4th Light Division up against the Polish 10th Motorized Cavalry Brigade.
I used Disposable Heroes: Point Blank. This AAR will be the first of a series of battles using these rules to demonstrate not only how the rules work, but how adaptable they are for all kinds of conflicts, periods, and tactical engagements. From WWII infantry battles, to Vietnam, modern, and all tank battles using 1/285th (6mm) minis, Point Blank is a system that allows you to do all kinds of games.
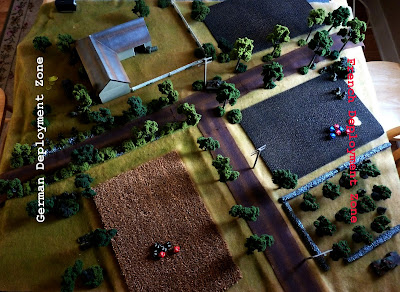
The game table layout:

The map depicts a small farm near a bridge over the San River (more of a creek here, really). The Germans are attempting to push along the river and capture the high ground around the farm as well as push recon and motorized troops across the creek. The Poles are attempting to stop the Germans by knocking out their mobile units.
The Objectives:
German: Capture Hill (2), Hill (3), and the bridge. The farm is a secondary objective.
Polish: Knock out, immobilize, or drive off any German tanks or vehicles. Preventing capture of bridge and hills are secondary objectives.
The Forces:
Polish:
ACC: 5
CC: 6
Guts: Corporal (9), Lance Corporal (8), Private (7)
T&E: Elite (+2)
Rifle Squad (Player 1):
1 Corporal w/Wz98 Rifle
LMG Team:
1 LMG Gunner w/Wz28 LMG
1 Assistant w/Wz98 Rifle
AT Rifle Team:
1 AT Rifle Gunner w/Wz35 AT Rifle
1 Assistant w/Wz98 Rifle
1 Lance Corporal w/Wz98 Rifle
LMG Team:
1 LMG Gunner w/Wz28 LMG
1 Assistant w/Wz98 Rifle
3 Riflemen w/Wz98 Rifles
Tanks and Support (Player 2):
3 TKS 20 FK w/20mm Cannon
AT Gun Team:
1 Gunner w/Bofors 37mm AT Gun
1 Lance Corporal Assistant w/Wz98 Rifle

 |
| TKS 20 FK and Bofors 37mm AT Gun. |
ACC: 5
CC: 6
Guts: Sergeant (8), Corporal (7), Private (6)
T&E: Veteran (+1)
Motorized Infantry Squad (Player 1):
1 Sergeant w/MP-38 SMG
LMG Team:
1 LMG Gunner w/MG-34 LMG
1 Assistant w/Kar-98k Rifle
LMG Team:
1 LMG Gunner w/MG-34 LMG
1 Assistant w/Kar-98k Rifle
5 Riflemen w/Kar98k
Opel Blitz Truck
Motorized Infantry Squad (Player 2):
1 Sergeant w/MP-38 SMG
LMG Team:
1 LMG Gunner w/MG-34 LMG
1 Assistant w/Kar-98k Rifle
LMG Team:
1 LMG Gunner w/MG-34 LMG
1 Assistant w/Kar-98k Rifle
5 Riflemen w/Kar98k
Opel Blitz Truck
Tank Support (Player 3):
2 Panzer I B
2 Panzer II B
 |
| Motorized Rifle Squads. |
 |
| Panzer Is and IIs. |
The Germans must come on the table on the road. However, they are allowed some pre-game recon to find alternate entry points on the table. If these are successful, they may allow the Germans opportunities to change the deployment. The Poles can deploy anywhere on their half of the table. However, they do not set up before the game starts, instead, they deploy by Activating a soldier, team, or vehicle and placing it on the board. No model or team may deploy closer than 16" to a German soldier, team, or vehicle.
The game begins with recon rolls for the Germans. I took the recon chart from the Disposable Heroes & Coffin for Seven Brothers book (page 45) and used it to allow the German player the chance to reveal different approaches to coming onto the table during the game. If the Germans rolled well enough, they would be allowed to enter the table in more advantageous locations. If they rolled really well, they would have been able to outflank the Polish positions. Recon, however, involves risk, and each player had to allocate an infantryman or tank to act as a scout to enable the players to roll on the table. If the roll went badly enough, they could be killed or destroyed.
I Followed the chart on page 45 of Disposable Heroes & Coffin for Seven Brothers and used the "Light Tank/Infantry" column. I also used the Chance to be Destroyed column as well. If a roll was high enough, the scouting model may have been killed or destroyed (removed from game). If a roll was a success, it allowed for a better German deployment on the table at the start of the game. The German players did not have to use the newly revealed recon location, but it is an option.
1st Success: German player allowed to deploy up to 12" along right hand table edge (Hill 3) up to 6" away from the edge.
2nd Success: German player allowed to deploy up to 12" onto the table, between river and Hill 2.
Success 3: Outflanked! The German player allowed to deploy on the road along the Polish deployment edge on the left side, up to the bridge (but not on it).
The Game:
The game started off with a roll for recon, which resulted in the German's achieving two successes. They decided to take advantage of the 2nd success and advance a squad along the hill.The Germans suffered no losses from the recon rolls (though there were some close calls).
Next, Initiative was rolled, with a tie: Germans (8 Guts + 7 + 1 T&E=16) vs Poles (9 Guts + 5 + 2 T&E=16). Since it was a tie, but the Poles have a higher T&E, they won initiative. The Poles decide to allow the Germans to go first since they wanted to hold back forces for the ambush.
German Activation Pool: 9 Activations (8 Guts + 1 T&E).
Polish Activation Pool: 11 (9 Guts + 2 T&E).
German Activation 1: (this Activation allows the Germans to place their forces on the table within 6" of the edge or using one of the pre-game recon locations-all subsequent Activations will be with individual soldiers, teams, or vehicles): The Germans move an Opel Blitz truck with a Motorized Infantry squad on board down the road 12". Half of the squad disembarks. The other squad arrives on the table dismounted without the Opel Blitz. They take advantage of the cover of the hill revealed by the successful pre-game recon. Next, a Panzer I moves down the road 16" towards the roadblock (a wagon pushed across the road). This move provokes a snap fire by the Polish AT rifle team. They hit the Panzer I but fail to penetrate.
 |
| Dismount! |
Polish Activation 1: The now revealed AT rifle team reloads and takes another shot at the Panzer I. They hit and penetrate, killing the commander and inflicting light damage to the tank. The driver passes his Gut check. The AT rifle team then reloads.
Next, a hidden Polish Bofors AT gun fires at the Opel Blitz with infantry on board. They Acquire, hit, and heavily damage the truck. The driver and his assistant is killed outright and the rest of the squad bails out. The AT gun then switches targets to the infantry squad that has dismounted.
 |
| Bail out! |
A German corporal, which had taken advantage of the advanced position along the hill moves towards the Polish AT gun and throws a grenade. The blast does not harm the AT gun crew and they keep their nerve.
The damaged Panzer I, with a dead commander, decides to reverse at fast speed off the table and withdraw from the battle.
Polish Activation 2: The Poles reveal an LMG team in the barn which opens up on the German infantry dismounted from the truck. They kill the Sergeant and suppress the LMG team.
 |
| German Sergeant goes down from Polish machine gun fire. |
The AT gun fires at the German infantry as well, and suppresses the Corporal of the squad. Both leaders had been at the front of the column when they dismounted. Leading from the front is dangerous work...
German Activation 3: The LMG team that had been suppressed by the fire coming from the barn rallies and hops over the fence to take cover behind the hay pile. They return fire to the Polish LMG team and suppresses them, though while firing their gun jams.
On the other side of the road on the hill, a German LMG team moves up and puts fire on the Polish AT gun crew. They kill the gunner and suppress the loader, though they also experience a jam.
At the same time, a Panzer I drives north of the road along the hill and attempts to find the AT gun to bring machine gun fire to bear. The crew acquire their target and pour fire into the AT gun position, driving off the crew by inflicting more than five suppressions.
Polish Activation 3: The Poles move up an LMG team to the position previously occupied by the AT gun crew, knowing the Germans will be pushing towards this objective. They draw a bead on the Germans approaching them along the hill and kill both the loader of the German LMG team and the Corporal of the squad. This fire also suppresses the machine gunner.
In a bold move by one of the TKS tankettes, the crew slowly drives around the curve of the hill until the German Panzer I is in view. Since they are within 12" they Acquire the target automatically. The TKS fires, but the two shots are glancing blows to the top part of the armor of the Panzer I.
German Activation 4: The Germans rally their LMG team and start to bring a crossfire onto the Polish infantry in the barn, suppressing them. Elsewhere, more German infantry move up along the hill trying to get into position to assault the Polish AT gun position.
A Panzer II arrives and finds the TKS in its sights. It scores a hit with its 20mm cannon, but the shot skims off.
Polish Activation 4: Luckily for the Polish LMG team in the barn, a nearby Corporal rallies them and gets them back in the fight. The LMG team puts fire onto the Germans position behind the haystack, but to no effect.
Now that they have the target zeroed in, the TKS pours 20mm fire into the Panzer I until it explodes.
 |
| Brew up! |
German Activation 5: The Germans maneuver more of their infantry and put more fire into the barn, but to no effect.
The Panzer II fires at the TKS and misses.
Polish Activation 5: The brave Polish AT rifle team reloads, fires and misses the Panzer II.
Meanwhile, the game of cat and mouse continues. The TKS reverses back around the bend in the hill out of LOS of the Germans. Safe...for now.
German Activation 6: The German infantry along the road are trying to maneuver towards the barn, but having difficulty. Their move is covered by the Polish LMG team in the barn that snap fires on their move.
In the middle, the German infantry is having more luck and they maneuver the LMG team and the Sergeant towards the top of the hill. The Sergeant gets close enough to throw a grenade onto the Polish LMG team on the hill. The blast from the grenade kills the LMG gunner, but the assistant takes over.
 | |
| Polish LMG team moments before a German potato masher lands among them and kills the gunner. |
Polish Activation 6: Having ignored the AT rifle team lurking under the wagon roadblock, the Panzer II on the road pays dearly. The AT rifle team fires, scoring a hull hit into a vital location, causing the tank to brew up with all crew killed.
 |
| AT Rifle ambush! |
German Activation 7: The German infantry are getting aggressive. The LMG behind the haystack fires at and finally removes the threat of the Polish LMG team in the barn, while on the center hill, the German LMG team fires at and kills the remaining Polish LMG gunner. This allows the Sergeant to move up and secure the objective on the hill.
Turning in place to face its frontal armor at this new threat, the Panzer II Acquires the TKS on hill 3 and fires its 20mm cannon into the hull until it explodes in a ball of fire.
 |
| The Panzer IIs 20mm cannon makes short work of the TKS. |
The Poles need to destroy all the German tanks, so the first TKS rolls around the same bend in the hill and Acquires the remaining Panzer II. By turning in place, the Panzer II had left its vulnerable side armor exposed to the TKS. They get lucky with an engine shot from the side, which immobilizes the Panzer II and causes light damage.
 |
| Side shot! |
Since the Sergeant was killed the LMG team moves up to retake the hill.
Now immobilized, The Panzer II turns its turret towards the second TKS who had knocked out its engine. They Acquire the target point blank, hit, score a blast against the crew and cause medium damage. Miraculously, the crew survive the blast, but are dazed by the concussion of the hit.
Polish Activation 8: Polish riflemen attempt to clear out the hill the German infantry just occupied, but their fire is ineffective.
Luckily, the crew of the TKS recover quickly. The gunner lets fly with a shot from the 20mm cannon while the driver jams it into reverse and speeds as fast as he can out of sight of the German Panzer II. The shot hits the Panzer II but does not penetrate its armor.
German Activation 9 (Final Activation of the turn): The German LMG team on the hill fires at the Polish AT rifle, with no effect, while German rifleman work their way up to support them.
The immobilized Panzer II does nothing else this turn.
Polish Activation 9-11: The AT rifle team, in a final move to finish off the remaining Panzer II, sneaks over to the stone wall along the road. They fail to hit the first time, but after reloading, their second shot hits the Panzer II in the lower hull. This shot penetrates and causes a catastrophic explosion, popping off the turret in a plume of fire and smoke.
 |
| BOOM! |
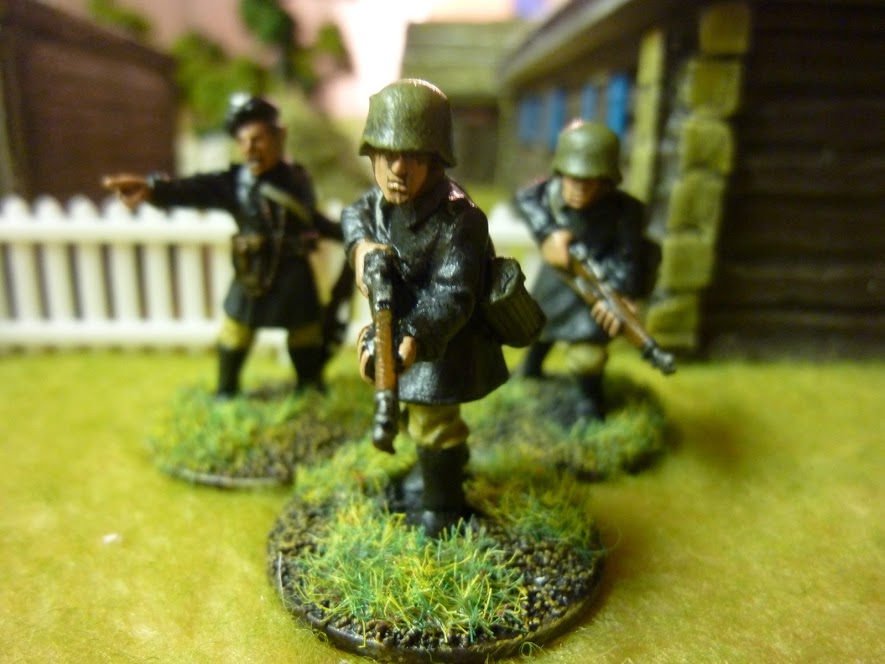 |
| Fall back! |
The Germans took only one of their objectives. Though they could now advance on the farm and the bridge, they lost a truck and all of their armored vehicles. Their infantry squads took heavy losses in leaders. They will be sure to advance more cautiously now that the Black Brigade has dealt the 4th Light Division a blow they won't soon forget!
I hope you enjoyed this battle report! I really had fun playing this scenario. I hope it gives you some ideas for your own WWII games or even games of Point Blank!
Polish Miniatures are Gorgon Studios/Blitzkrieg Laboratory, with Warlord Games TKS tanks and AT.
Germans are all Crusader Miniatures, with Warlord Games tanks, and Army Group North trucks.
The houses are Old Glory.